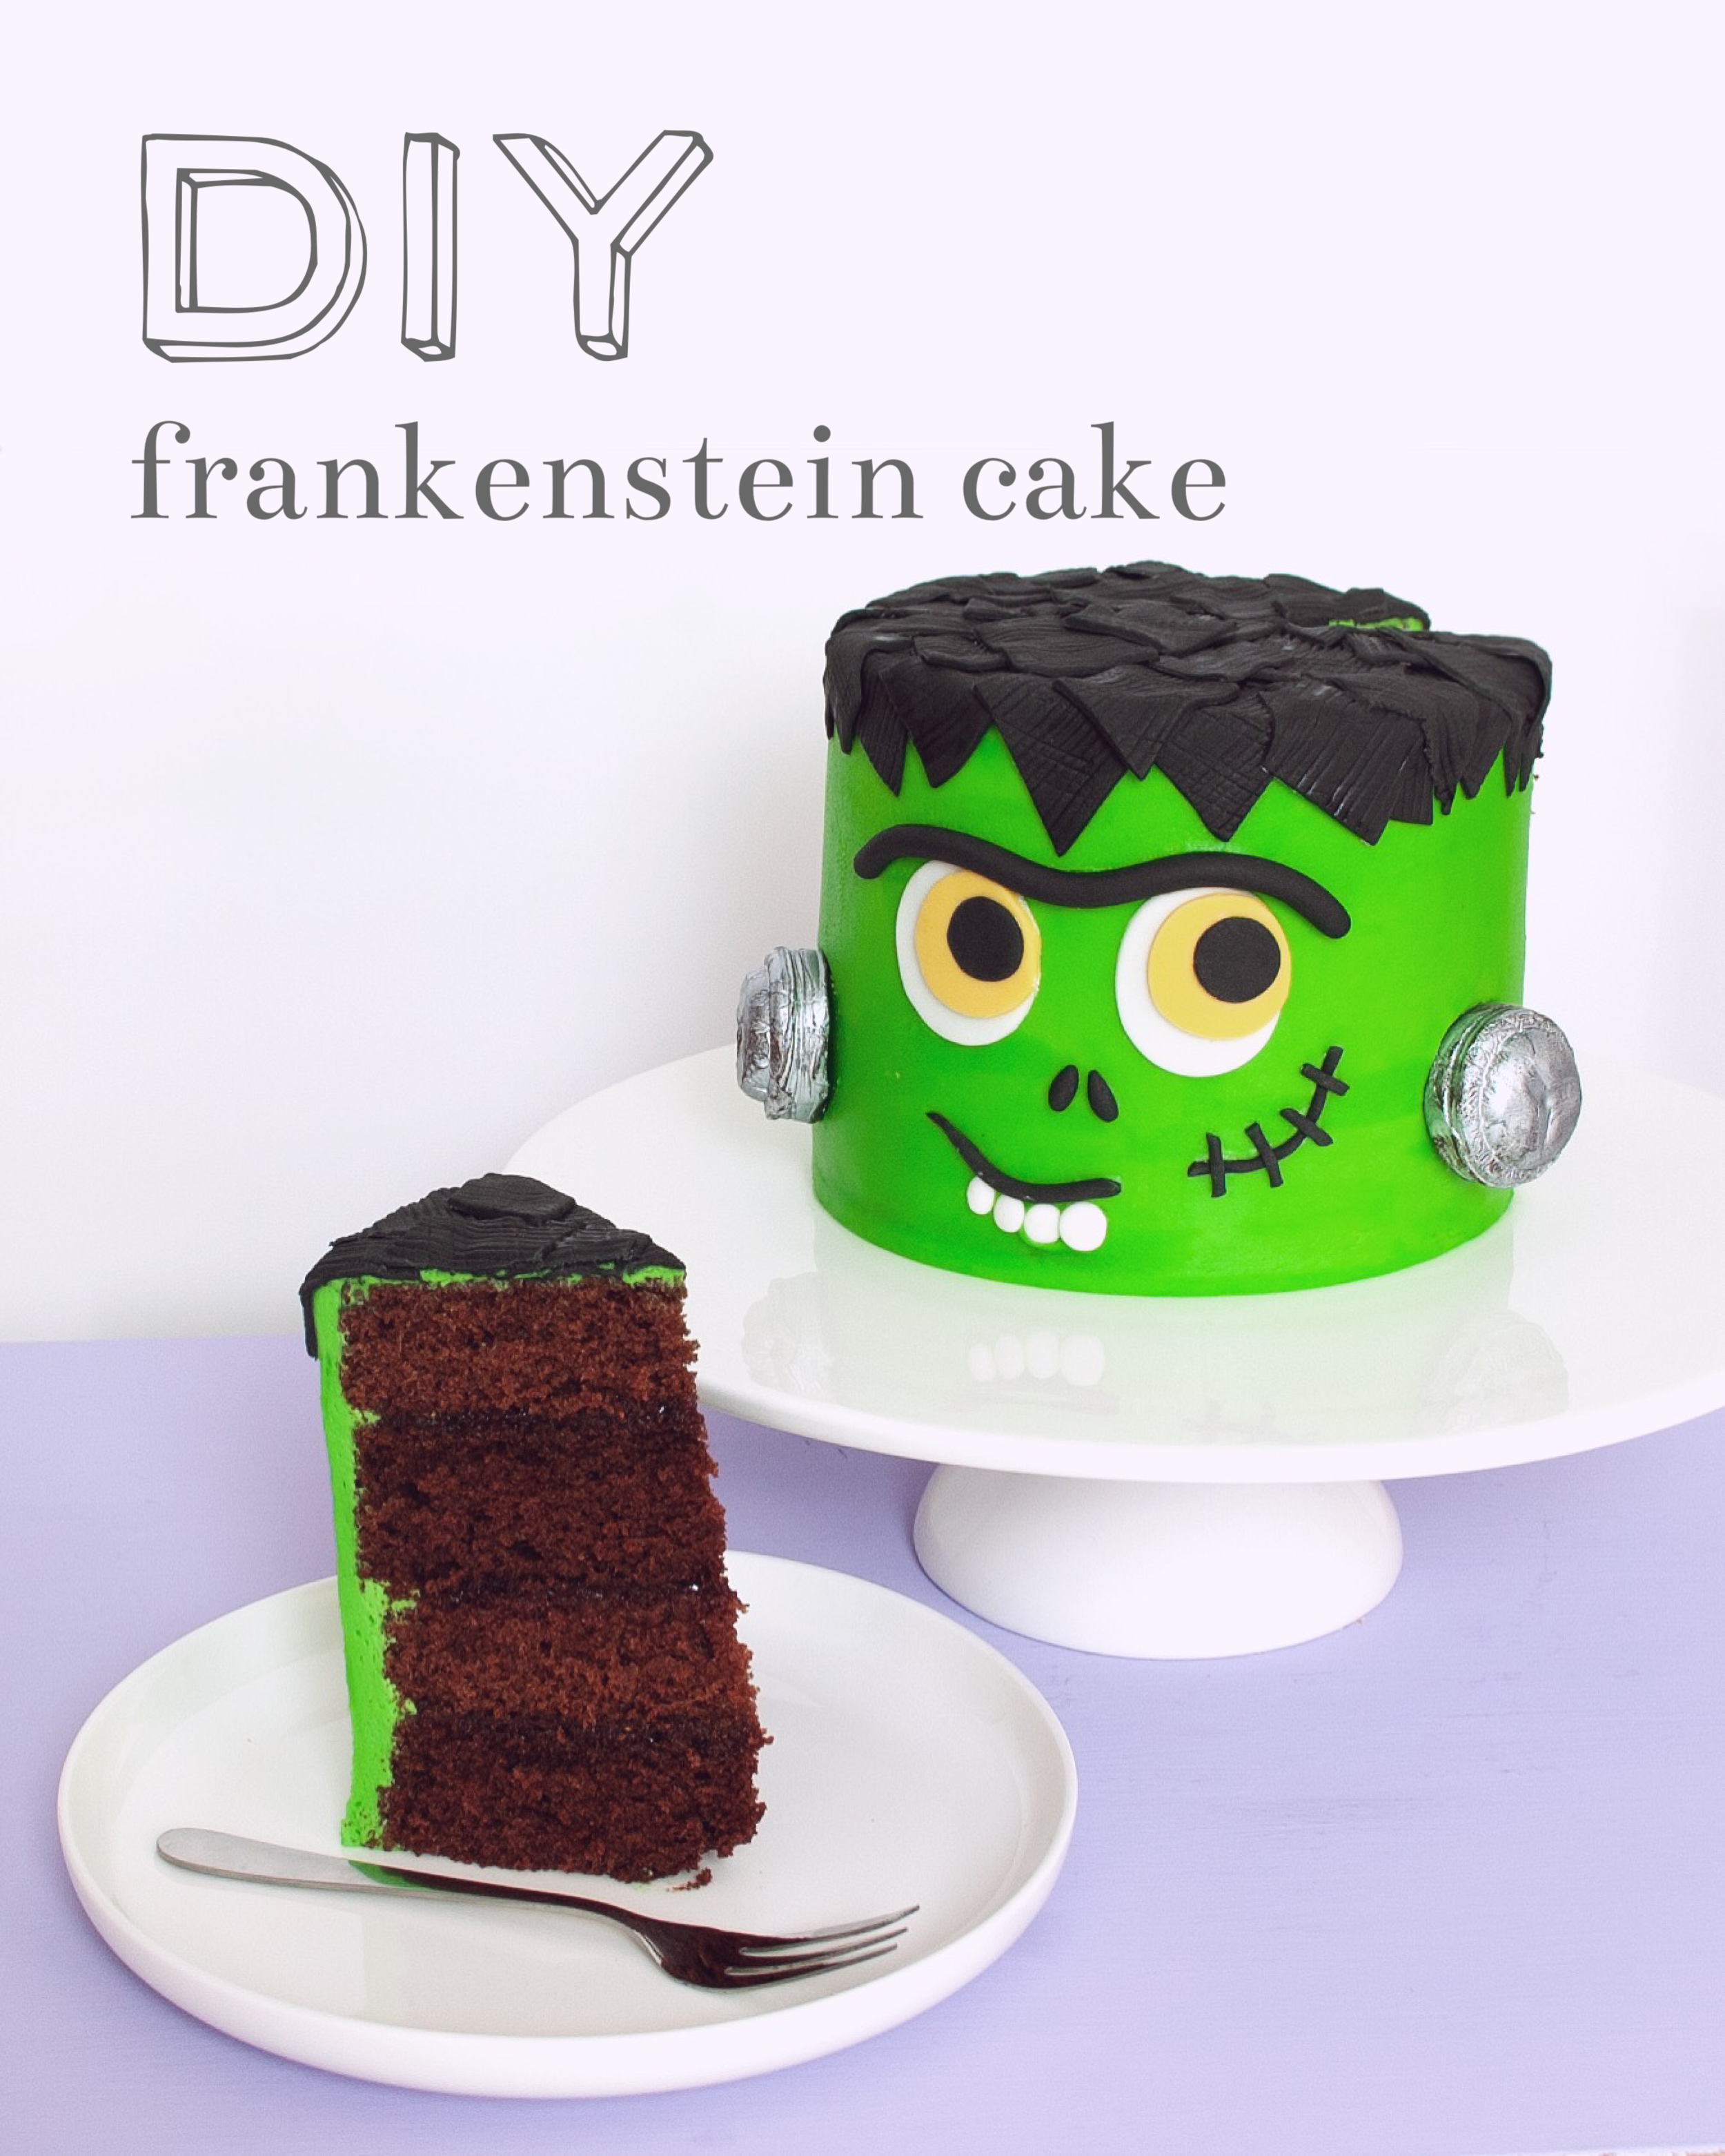
Cute AF Frankenstein Cake Tutorial (beginner friendly)
A super cute Frankenstein cake to keep this Halloween train toot tooting, ah yeah! Hop on board cos he’s hella cute! And he was easy AF to boot, winner! I swear the whole thing only took a few hours and since all of the fondant works made up of small pieces there’s no worries about it playing up. My favourite kinda cake!

Let’s go!
Ingredients
Cake
10oz butter
10oz sugar
5 eggs
9oz self-raising flour
1oz cocoa powder
5 tbsp boiling water
6 tbsp raspberry jam
Decoration
250g butter
500g icing sugar
1 tbsp cream cheese
1tbsp lemon juice
Green food colouring
250g black fondant
20g white fondant
20g yellow fondant
40g dark chocolate
10g golden syrup or liquid glucose
Edible silver shimmer spray
2 cocktail sticks
Method
Cake
Line two 6-inch cake pans with parchment paper and preheat the oven to 180°C/160Fan.
In a large bowl, whisk together 10oz of sugar and 10oz of butter until pale and fluffy. To this, add 5 eggs (lightly beaten), 9oz self-raising flour, 1oz cocoa and 5 tbsp of hot water (from the kettle). Mix together until just smooth.
Split the batter between the two cake pans and bake for 35-40 minutes or until a skewer comes out clean.
Leave the cakes to cool in the pans for 5 minutes before turning out onto a wire rack to cool completely.
Bolts
In a small bowl melt 40g of dark chocolate over a pan of boiling water. Remove from the heat and allow the chocolate to cool for 5 minutes.
Before adding the syrup, its best to try to bring it closer in temperature to the chocolate, otherwise we run the risk that it might seize. I usually do this by leaving the bottle in a sunny spot in summer or near a radiator for 10 minutes in the winter. Add 10g of golden syrup to the melted chocolate and stir until just combined. Try not to over-mix or it might not set.
Leave the modelling chocolate on the side to firm up a little for 10 minutes or until its easy to handle.

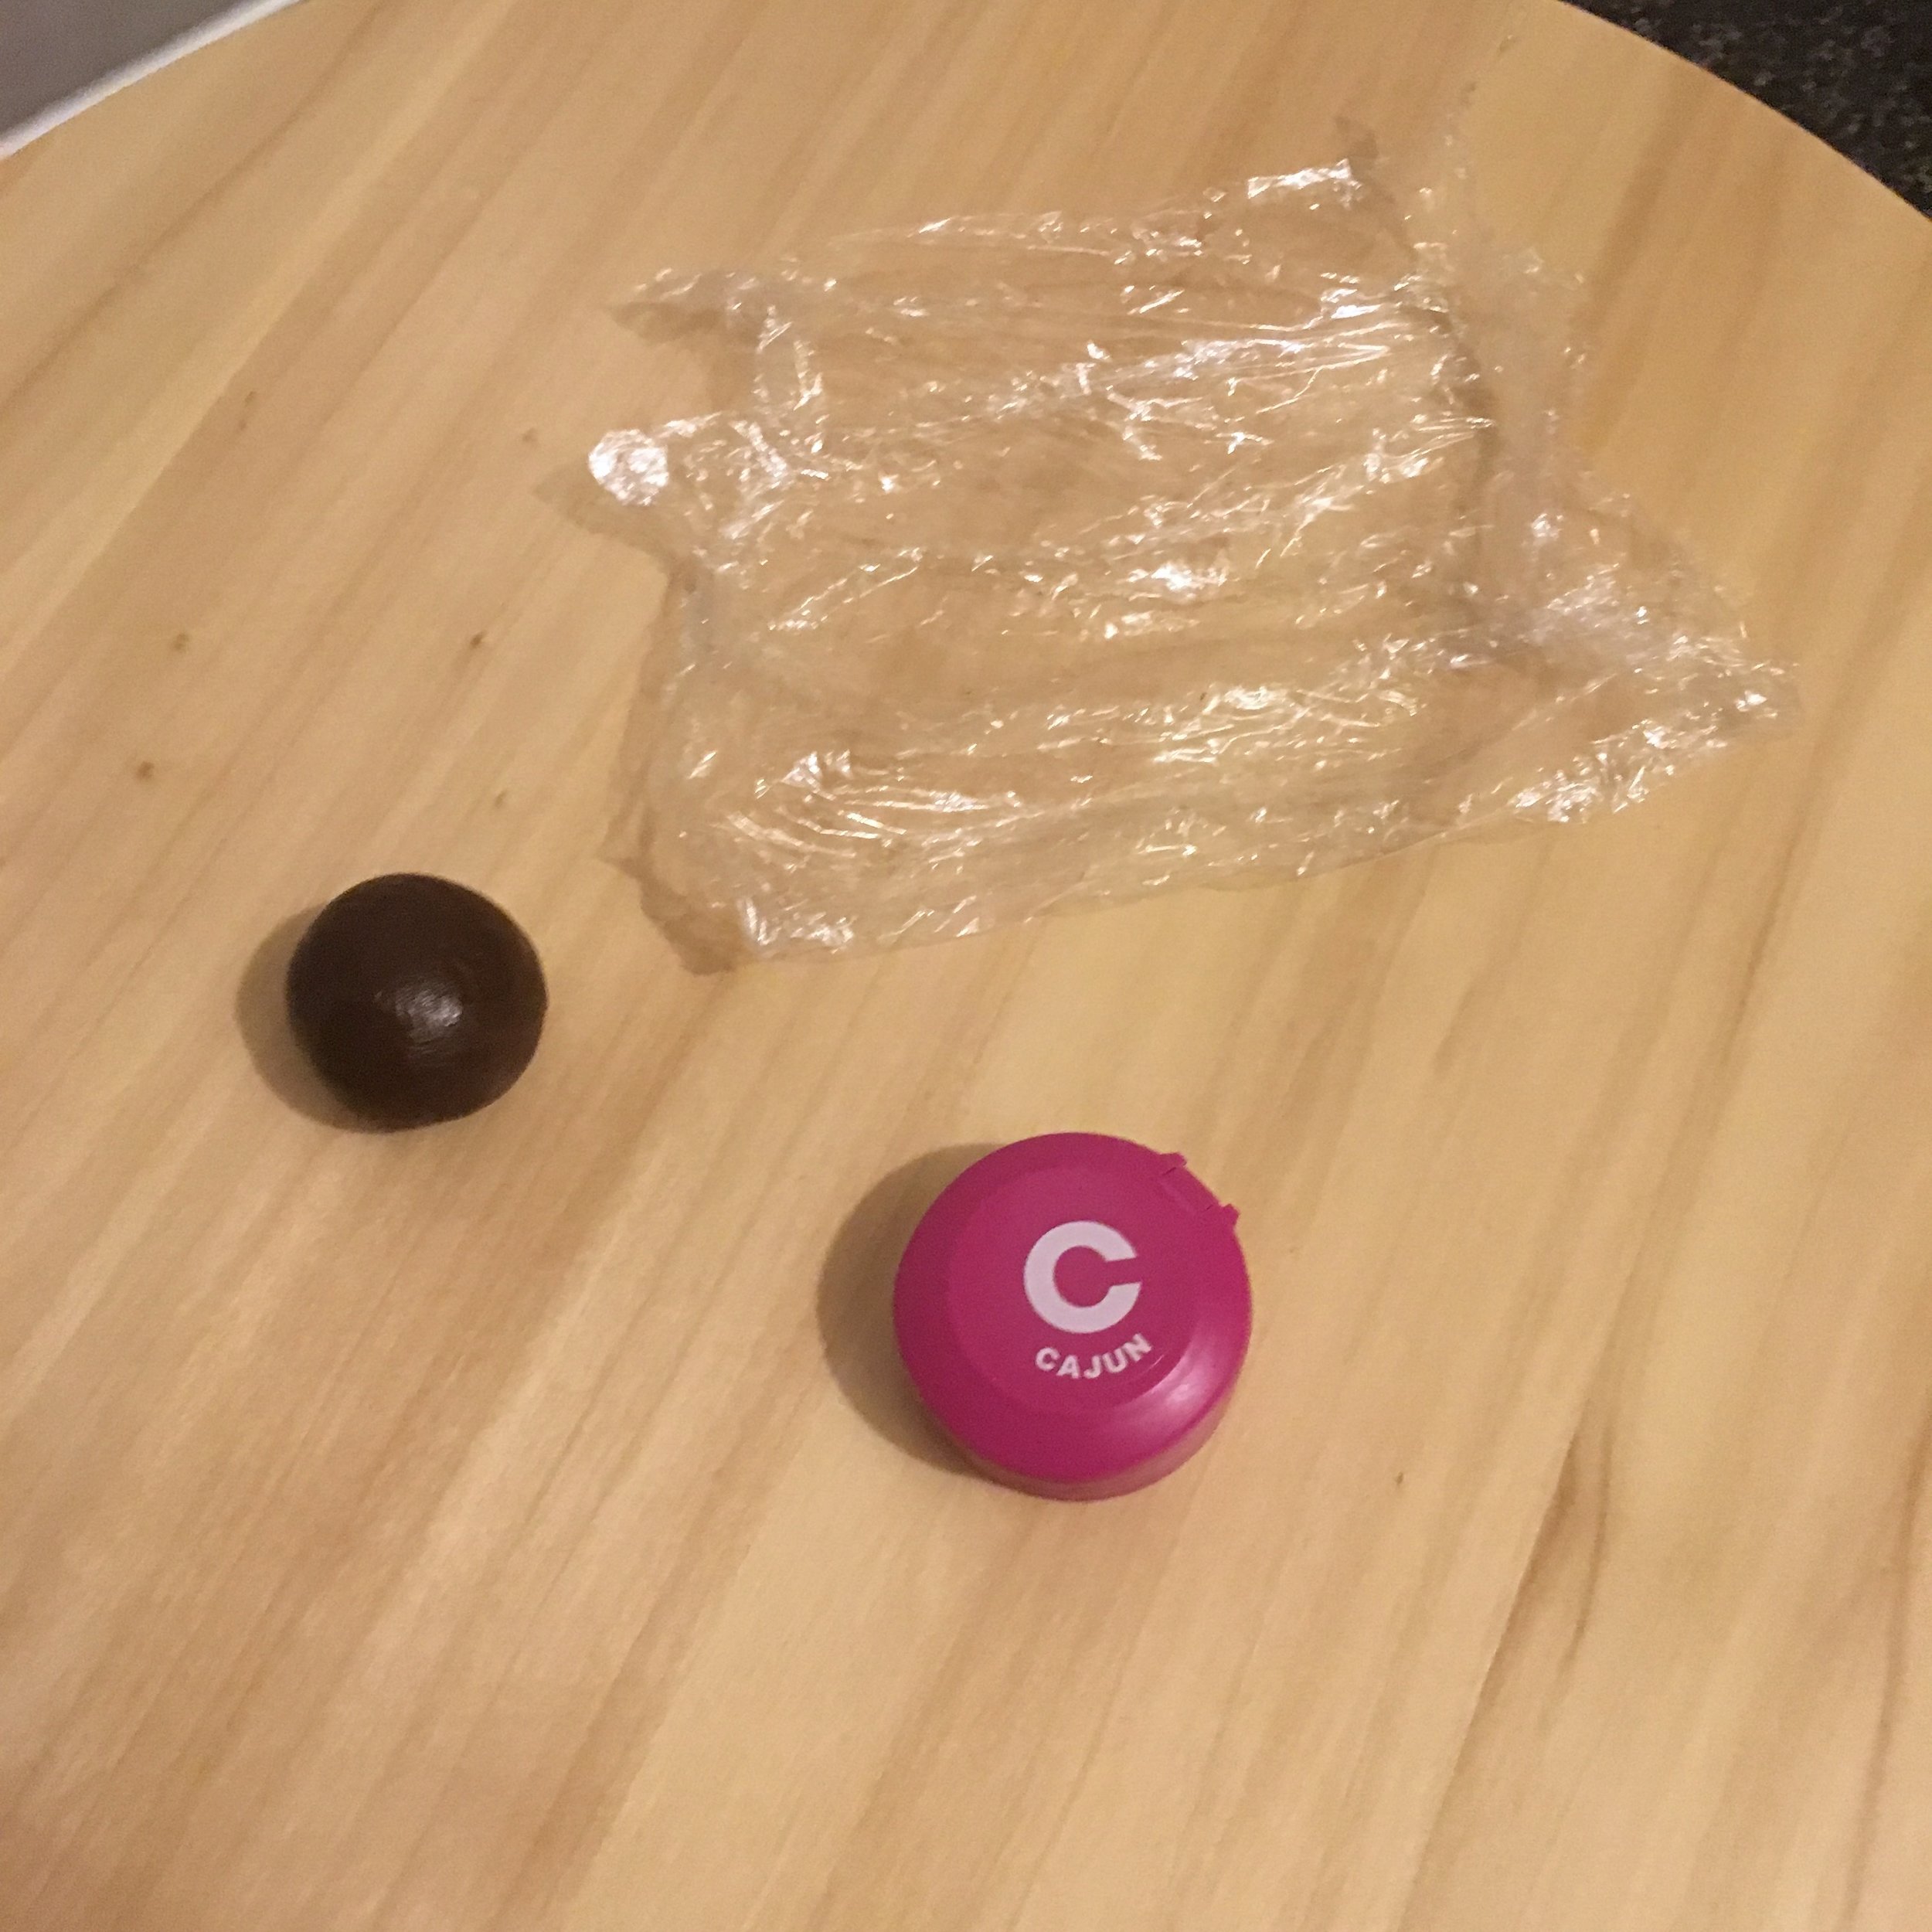
While you’re waiting, remove the lids from 2 spice bottles and give them a good clean. Dry them off and line them with cling film. Try to leave some cling film hanging over the sides to help you pull them out later.
When the chocolate has firmed a little (think play-doh) split it in half and press each half into one of the spice lids, pushing in firmly so it takes the shape. Into each, push a cocktail stick in the centre, almost through to the other side but not quite. Leave it to set for 10-20 mins.

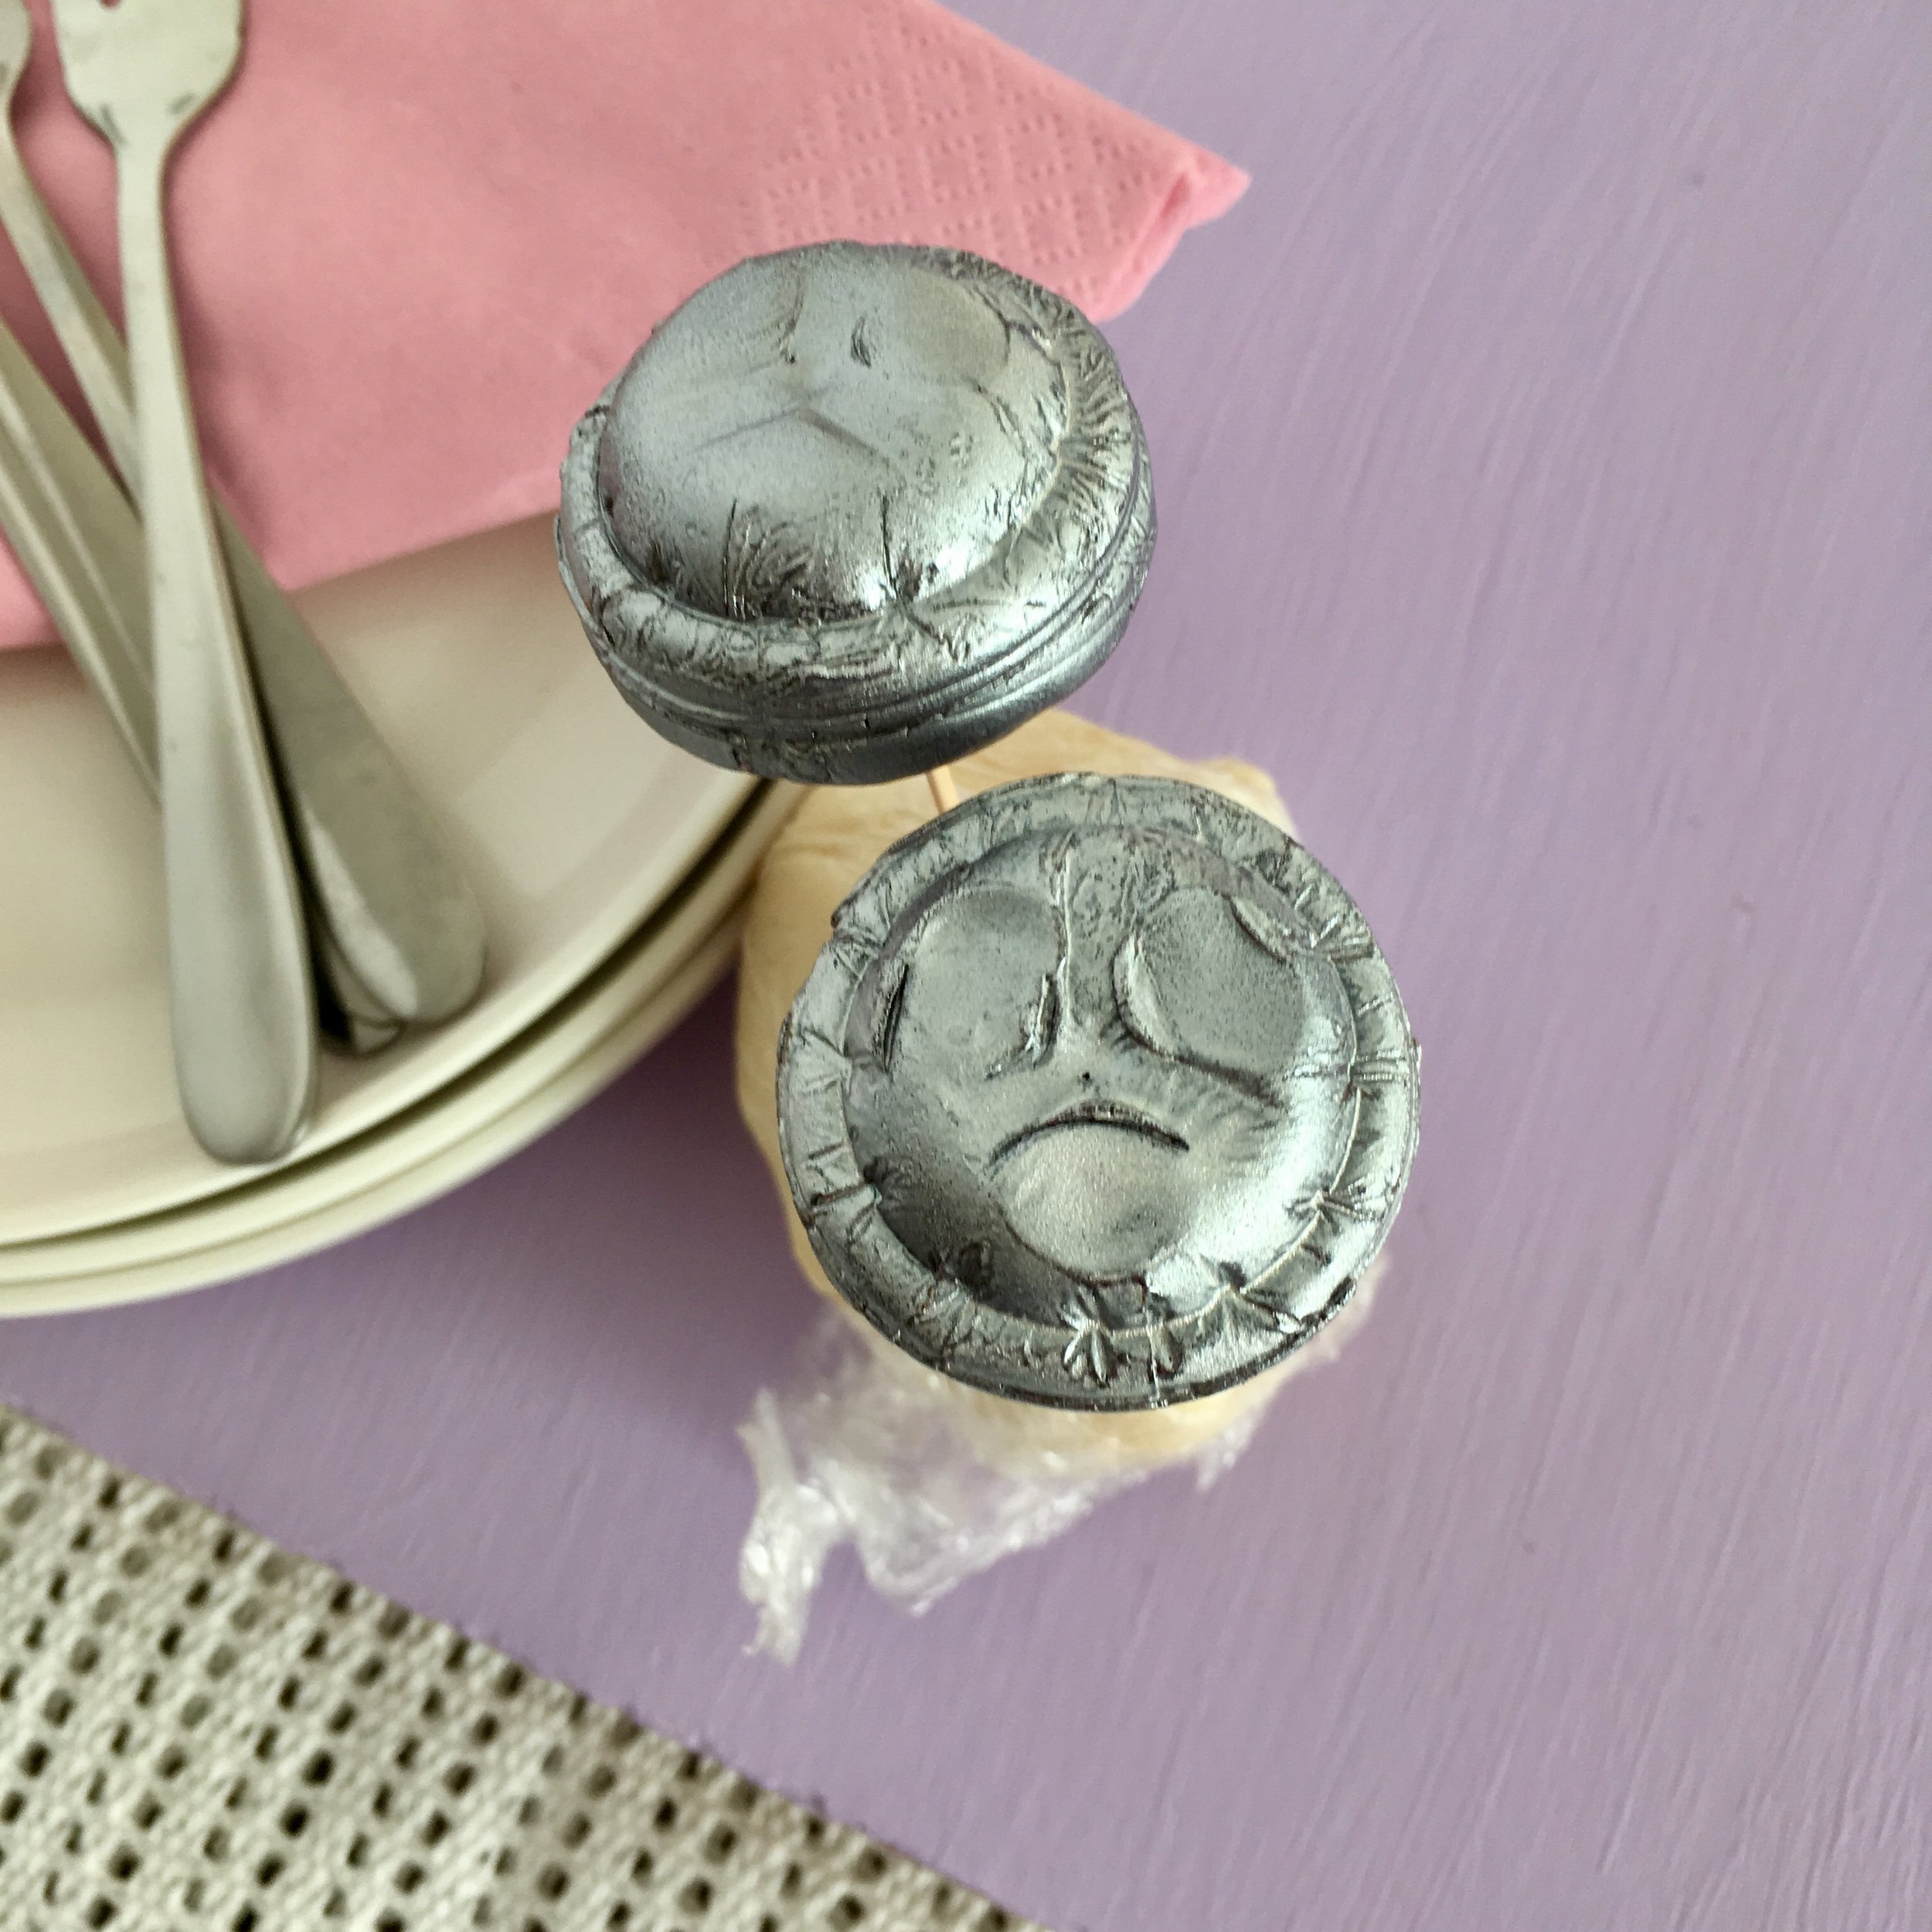
After 10-20 minutes, gently pop them out of the lids and transfer to the fridge to set fully. When they’ve completely firmed up, spray them with edible silver shimmer and leave to dry somewhere cool and dry.
Frosting
In a large bowl, mix together 250g of butter, 500g of icing sugar, 1 tbsp of cream cheese and 1 tbsp of lemon juice until smooth and fluffy. It should be easy to spread but hold its shape when the beaters are removed.
Gradually colour the frosting green until you have a vibrant Frankie-esque colour. Be careful to remember though that food colouring usually develops a little more with time so it should get a little darker as the day goes on.
Layer Up
Split both cakes into 2 equal layers and level off any domes on top. Attach the first layer to your cake plate or board with a smear of frosting. Spread 2 tbsp of raspberry jam over the top of the first layer and then add the next sponge on top. Repeat for the other 2 layers, building upwards.

Apply a thin layer of frosting all over the outside to catch the crumbs and place into the fridge to chill for 20-30 minutes.
After chilling, remove the cake from the fridge and cover the whole thing with another layer of frosting, a little thicker this time. Using a palette knife or bench scraper, smooth down the sides and the top. Return the cake to the fridge.
Hair
While the cake is chilling, roll flat 2/3 of the black fondant to 1-2mm thick. Using a blunt knife or fondant tool, score lines all across on the diagonal. First in one direction, then the other so they criss cross. Cut the black fondant into diamonds.


Remove the cake from the fridge and attach the black diamonds all over the top as Frankie’s hair. If the frosting has started to crust, use a food only paintbrush and water to lightly dampen the back of the diamonds before laying them onto the cake. This will help them stick in place. Repeat until the entire top of the cake is covered with some diamonds poking down the sides as a fringe. If you have any leftover diamonds you can roll them back in with the remaining black fondant.

Eyes
Roll the white fondant flat to 1mm thick and using the spice lids from earlier cut 2 circles. Gently press in two edges to create more of an oblong than a circle.
Roll the yellow fondant flat and this time cut 2 smaller circles, I used bottle tops. Attach these to the white circles with a little water. Offsetting the yellow into the top right corner rather than the centre.


Finally, cut 2 small black circles in fondant and attach these on top of the yellow. Carefully trim any excess hanging over the edge. Wet the backs of the eyes lightly with sterilised water and attach to the front of the cake.

Roll out a rope in black fondant and cut to size (long enough for his monobrow). Curve this along the top of the eyes to follow their shape.

Mouth
Roll another black fondant rope this time a little thinner and tapered at one end. It should be roughly 2-3 inches long. Place this along the bottom left side of the cake, curving slightly into a half smile.
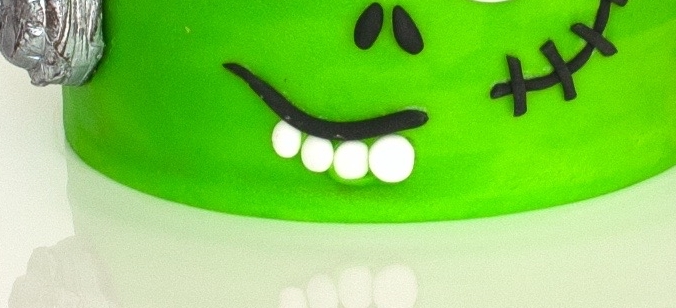
In the palm of your hand, roll 4 small white fondant balls, decreasing in size. One by one, flatten them slightly between your thumb and forefinger. Place them along the bottom of the lips, biggest on the right getting smaller as you work along to the left
Nose and Scar
Tear off 2 tiny pieces of back fondant and roll them between your thumb and forefinger until they become tear shaped. Place them in the centre of the cake as nostrils. Attaching with water if needed.

Roll a very thin rope in black fondant roughly 5cm long. Place this along his right cheek, curving slightly towards the bottom. Using a blunt knife, carefully press into the fondant little indents where the stitches should be. Roll another black rope and this time cut it into small pieces the size of stitches. Lay these on top where you made the indents.
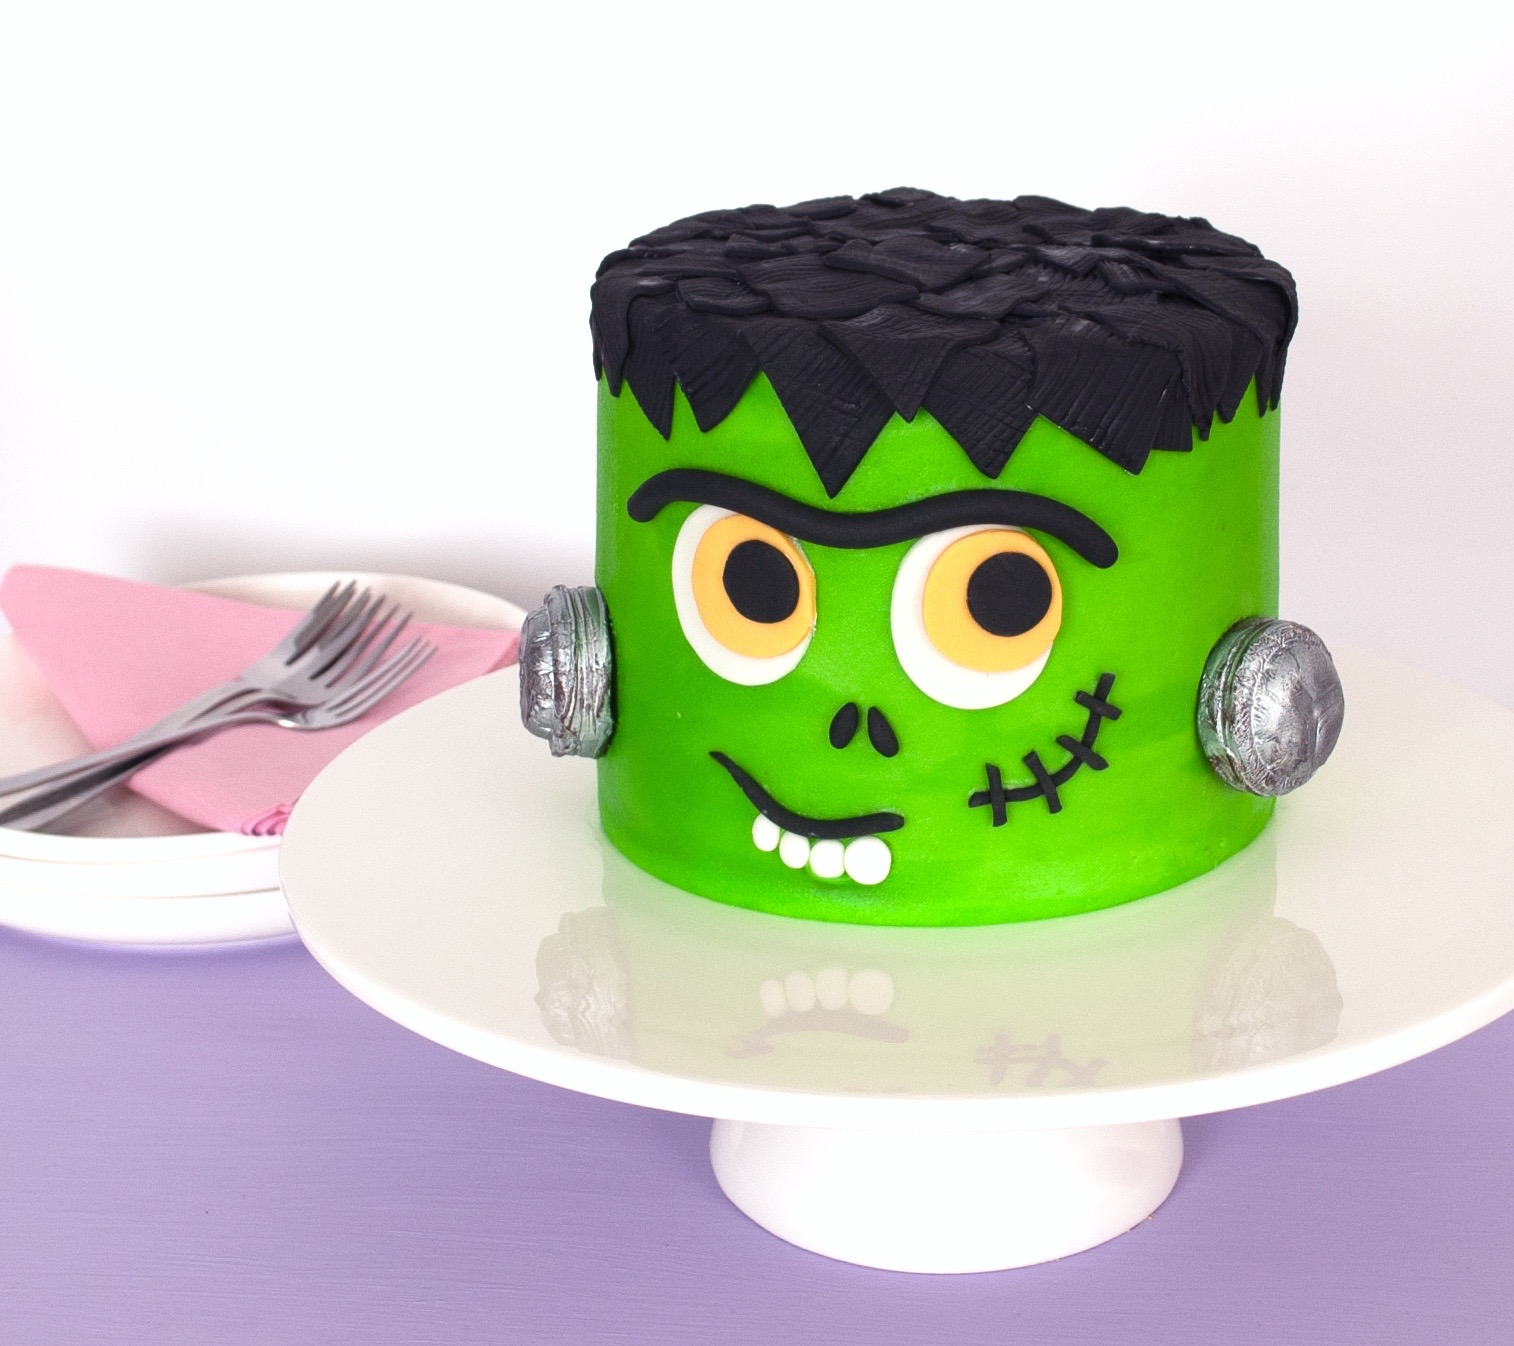
Finishing Touch
When the bolts have dried, pop them carefully into the sides of his neck. Just be sure to remove them before you cut him open.

Boom! We’re done, how cool are you?! See you next week when I’ll be homaging Doctor Who, I got you Jodie!