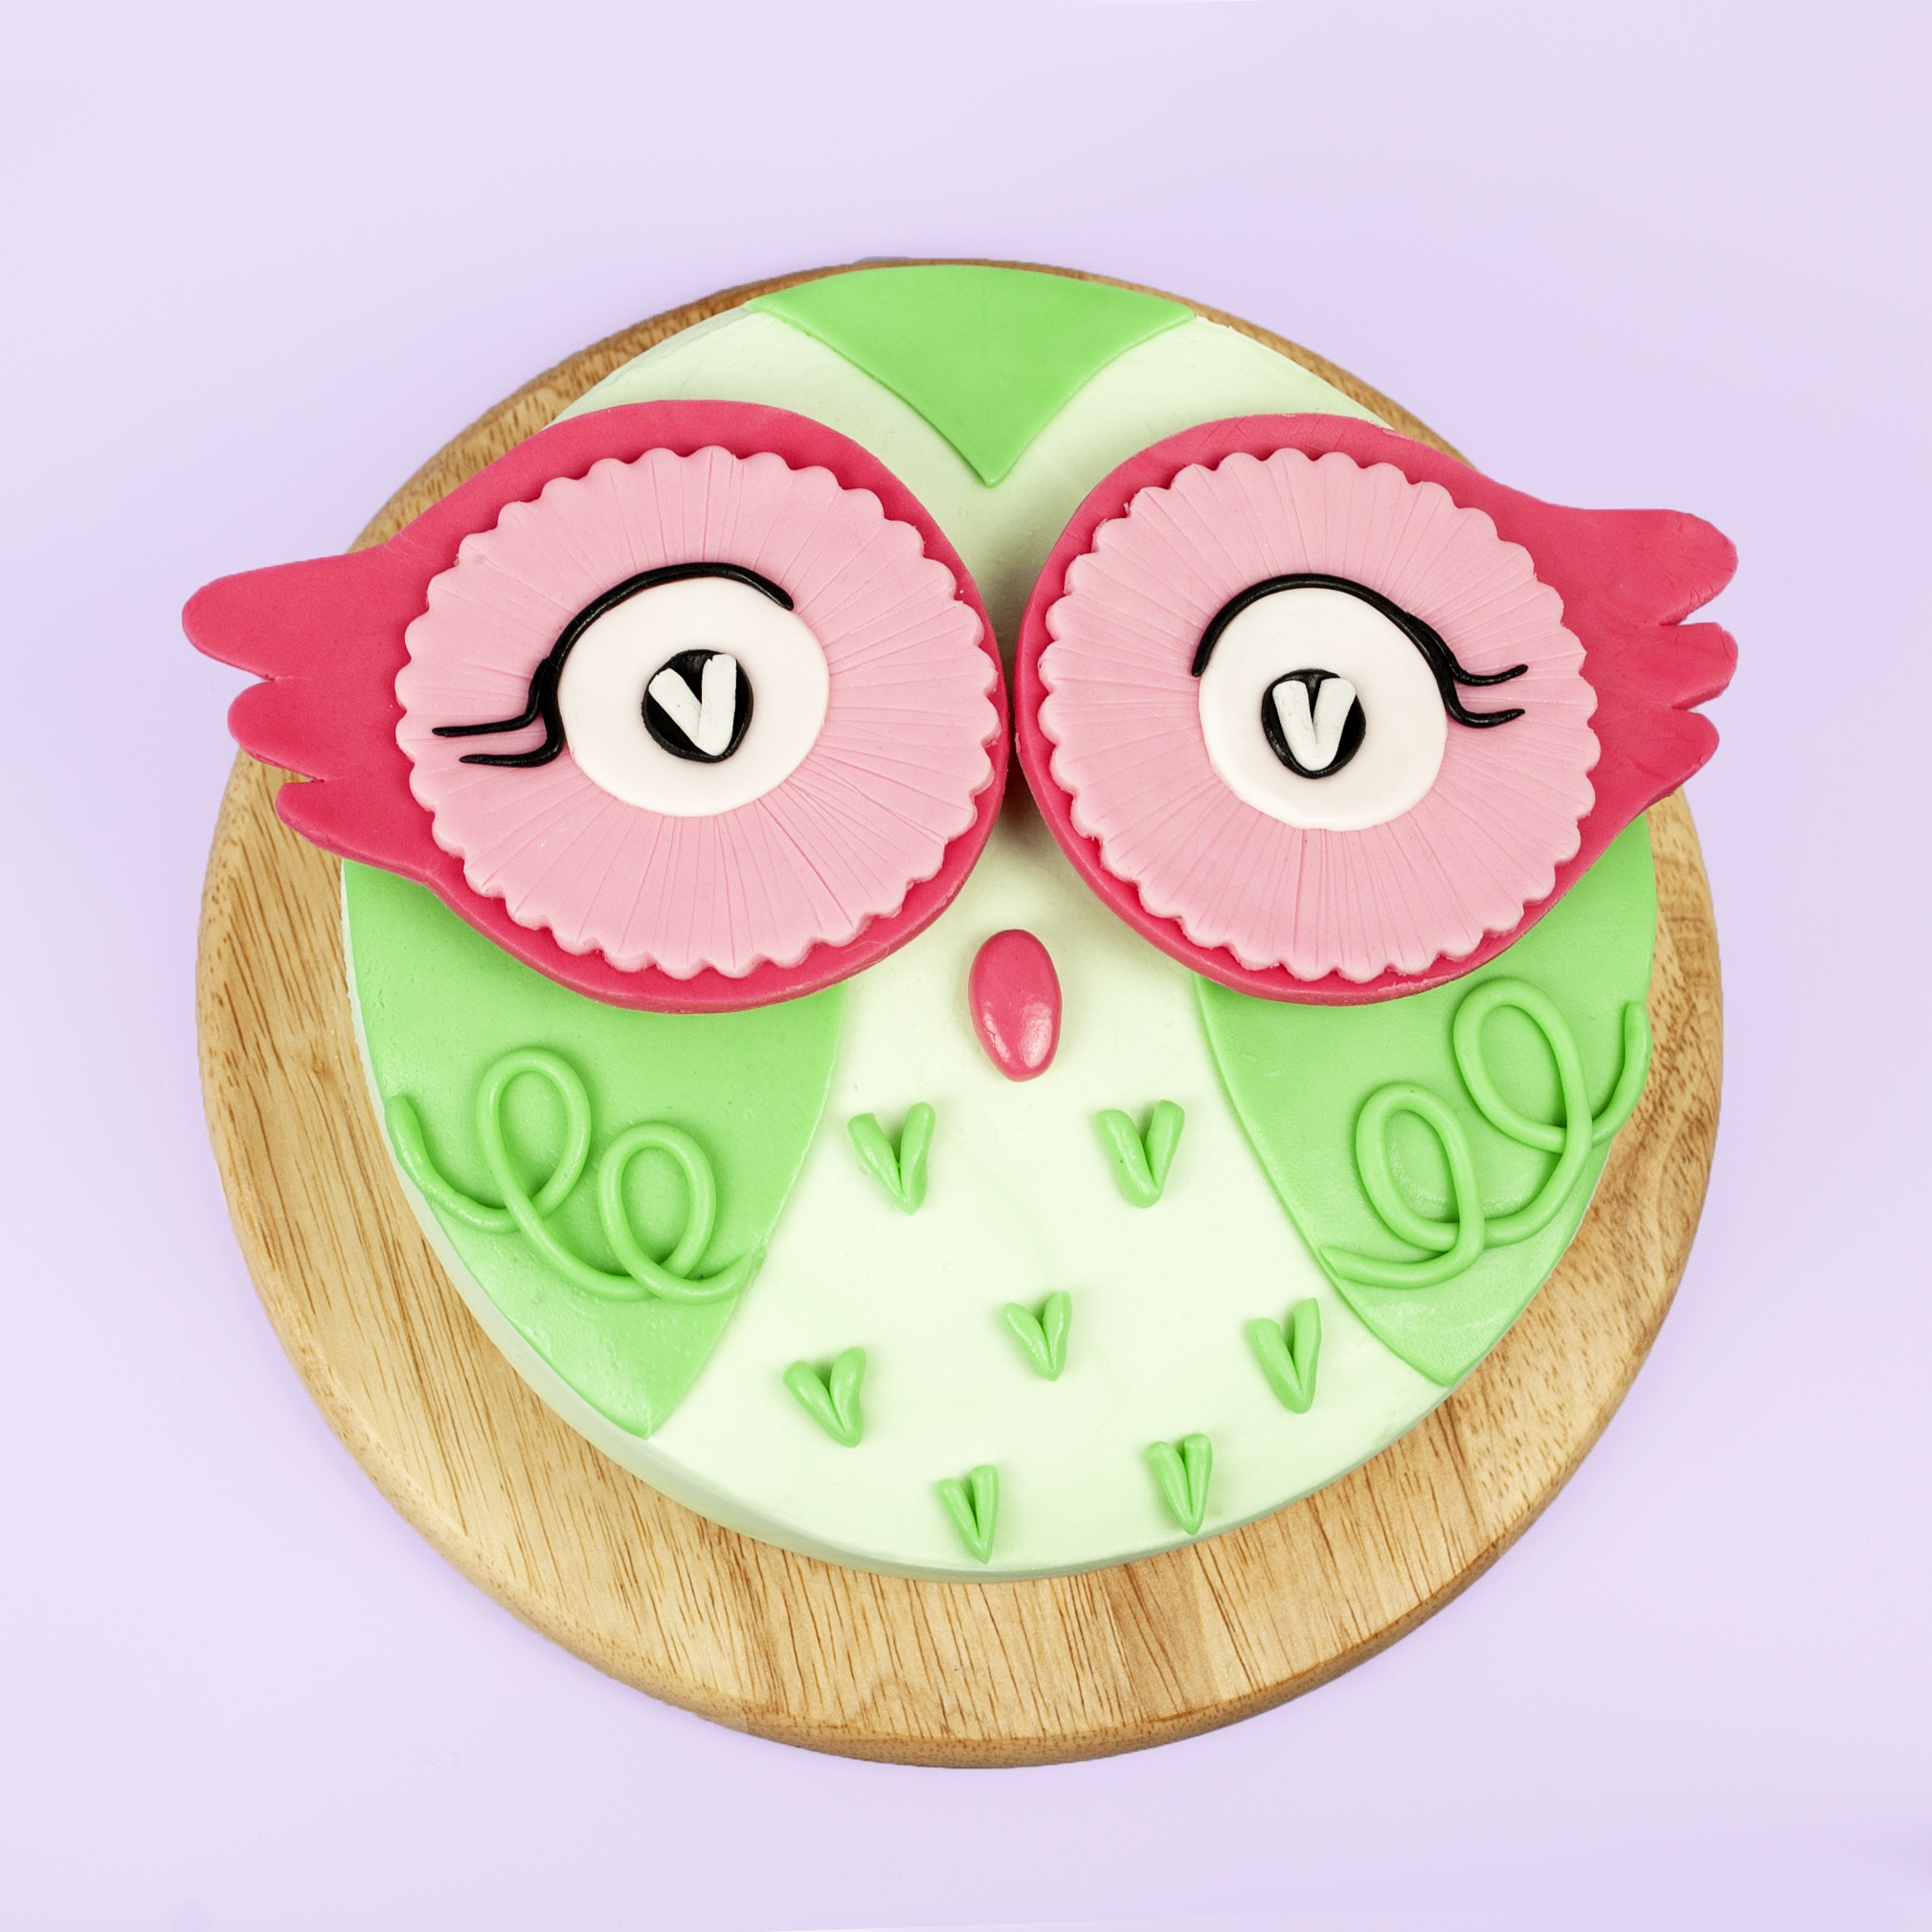
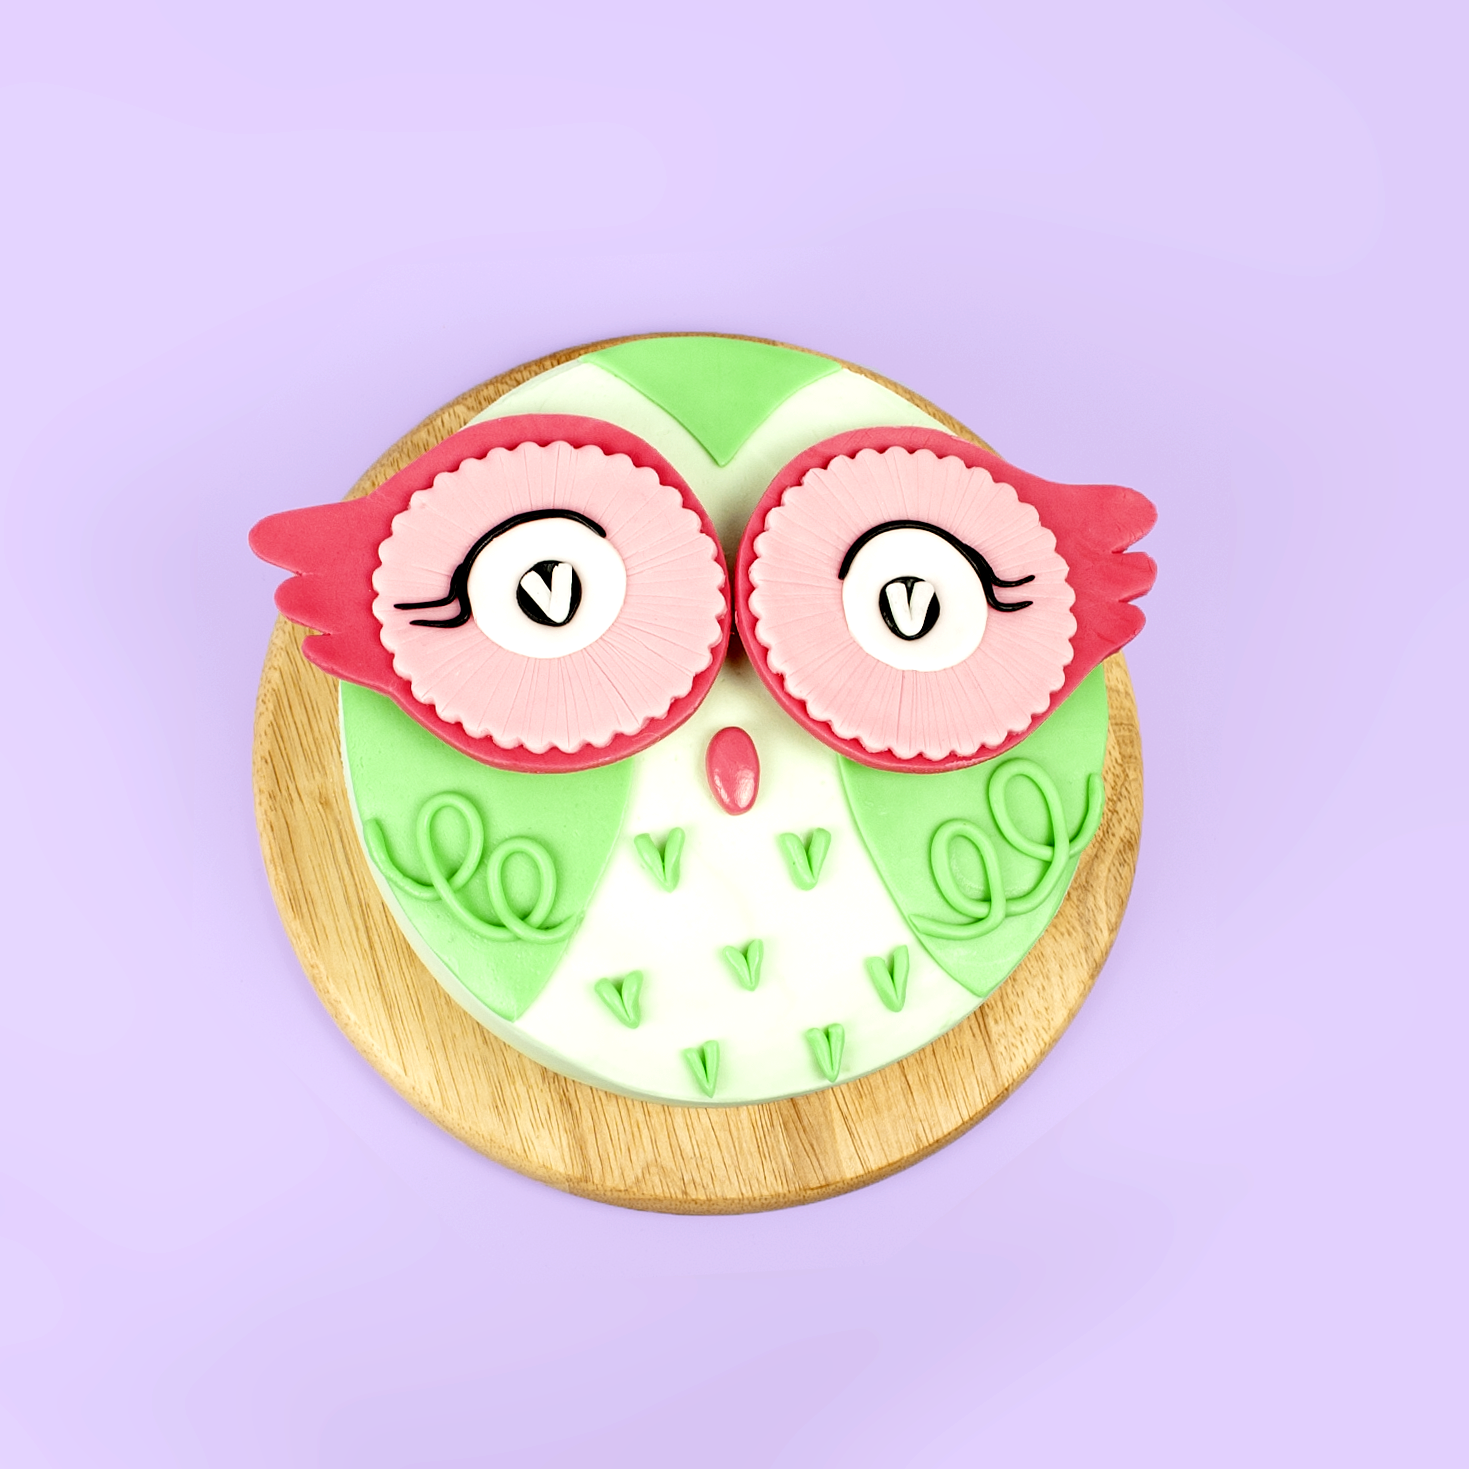
DIY Cute Green Owl Cake

Hellloooo! What a treat this week I’ve had the absolute privilege yet again of having my cake designed by the wonderfully talented @lesbianceart and isn’t it a beauty? I rolled up to her on a random Saturday afternoon feeling sorry for myself because I wanted to make an owl but I didn’t know what it should look like. Within the hour she had 9 for me to choose from, I am spoiled! I landed on this beaut because she told me it was inspired by a certain Luna Lovegood and you know me, an absolute fiend for anything Harry Potter I jumped on it.
And its super beginner friendly again, everything's based on simple shapes, working together to make something really special. Kinda like Lego but prettier and edible and way less hazardous for your feet. I have a friend who’s favourite insult is ‘I hope you step on a Lego’. Note to self, must get nicer friends.
Before we get cracking I have few favours to ask. First up, please keep in touch! It stops me fading into the internet wilderness and if you join the mailing list you get exclusive access to ask me anything cake related. I mean it doesn’t have to be cake related but I warn you now my general knowledge is the pits! You can sign up to the mailing list below, add me on Insta @icinginsight, follow me on Pinterest or if you’re really amazing, why not try all three?? I promise I will never give your details out to anyone else I hate spam too, it’s the worst! Secondly please go check out @lesbianceart, she’s ridiculously talented and the sweetest person you will ever meet but you’ll never know unless you take a look for yourself!
Ingredients
1 batch of carrot cake (I used this one)
250g butter
100g cream cheese
500g icing sugar
1tsp natural orange flavouring
250g green fondant
100g bright pink fondant
100g pale pink fondant
50g white fondant
25g black fondant
Green food colouring
Method
1. First up, let's start with the eyes cos they take the longest to dry and we need them completely firmed up to stop the ears drooping, I mean no one wants to see that.
2. Create a template for the eyes by drawing around a large circle cookie cutter and then add three little ridges to the side as ears. Cut the template out.

3. Roll flat the dark pink fondant until its roughly 1-2mm thick. Place your eye template on top and cut around. Move this piece to a tray lined with parchment paper.
4.Repeat this step but this time flip the template over so that the ears are facing the opposite direction. Move this piece to the tray too.
5. Roll out the pale pink fondant to 1-2mm thick and select a round cookie cutter with a scalloped edge, one size smaller than the cutter you used to make the template. Cut out two pale pink circles and place them on the tray.


6. Grab a pointed fondant tool or a small knife and score lines from the centre of the pale pink circles to the outer edge, careful not to cut all the way through.
7. When you’re happy with the texture on the pale pink circles, brush the backs with a little water and attach to the top of the dark pink circles.
8. Roll the white fondant to the same thickness as before and cut out two small circles, I found that spice jar lids were the perfect size for this job. Attach these on top of the pink eyes with a little water.

9. Roll the black fondant and cut out two tiny circles (a piping tip works great), add these on top of the white.
10. With the remaining white fondant, roll a small piece into a thin rope about 5cm long. Pinch the rope in the middle to make a ‘V’ and trim the tops to match the size of the centre of our owls’ eyes. Repeat for the second eye and attach with a brushing of water.

11. Lastly on the eyes, roll a small piece of black fondant into a very thin rope. Lay this around the top half of each eye, flicking at the end to make some perty eyelashes. Repeat to add the second lash.
12. Leave the eyes to dry thoroughly, turning over halfway through. It should take roughly 1 full day before they’re ready.
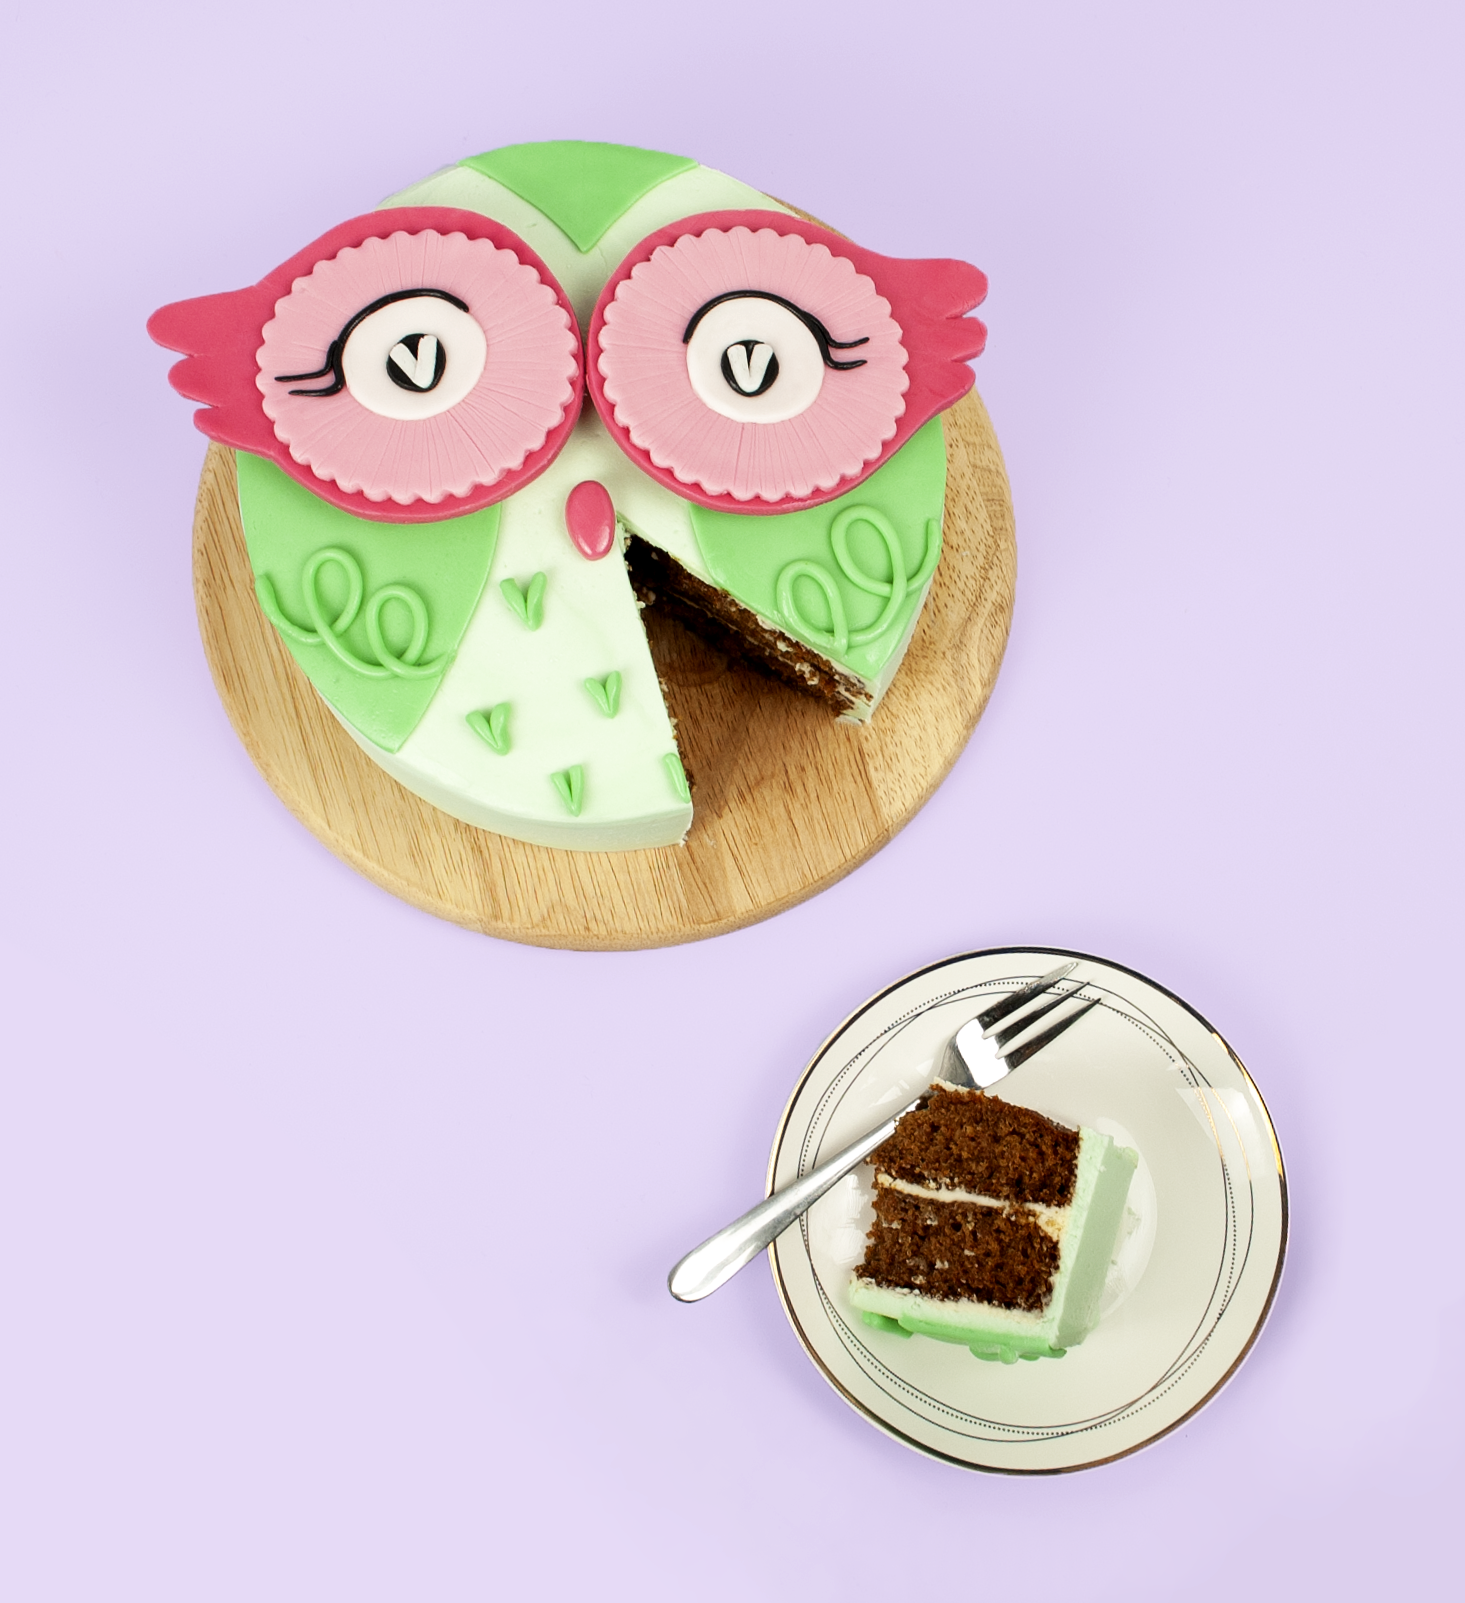
13. When the eyes are dry, mix up one batch of carrot cake (recipe here) and split the batter between two lined 7.5inch cake pans and bake in a pre-heated oven at 180°C/160°Fan for 30-40 minutes until a skewer comes out clean.
14. When baked, leave the cakes to cool in the pan for 5 minutes before turning out onto a wire rack to cool completely.
15. In a large bowl, beat together 250g of butter and 100g of cream cheese until creamy and smooth. Gradually add in 500g of sifted icing sugar and continue beating until it’s smooth but holds its shape when the beaters are lifted out of the bowl
16. To the frosting, mix in 1tsp of orange flavouring and a small drop of blue and green food colouring until you have a pale minty colour.
17. Build the cake with a layer of frosting in the centre and attach it to a cake board or plate with a little frosting. Apply a thin layer of frosting all over the cake to pick up the crumbs and place in the fridge to cool.
18. After 30 minutes, remove the cake from the fridge and apply a generous layer of frosting all over. Smooth over with a palette knife or bench scraper. Return the cake to the fridge.
19. To create a template for the wings, draw around the cake tin you used to bake the cakes. Pull the tin across until the edge is roughly 2 inches from the side of your drawn circle and trace around the tin again to create an almond shaped wing. Using the tin gives you the perfect curve to fit your cake. Cut the template out.

20. Roll flat the green fondant and cut around your template twice to create two wings. Leave them to dry a little for 10-15 mins on a piece of parchment paper.
21. Using the wing template cut out a small triangle. One edge should follow the same curve as the wing and the other two should bend inward slightly. Use this to cut out the head piece from green fondant and place on to parchment paper.

22. Remove the cake from the fridge and brush the top with a little water where the wings will go and lay the wings on top. Trim a little off the top of the wings just enough so they don’t go any higher than the eyes will.
23. Attach the small green head piece to the top with a little water and smooth into place.
24. Add the eyes to the top of the cake, securing into place with a bit of frosting.
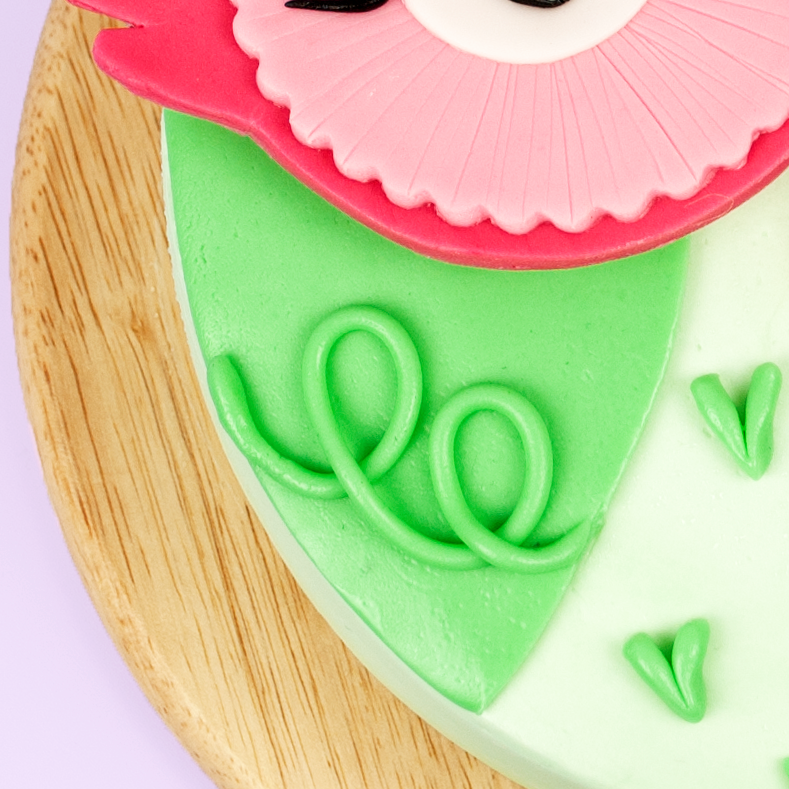
25. Roll the remaining green fondant into a long thin rope and attach to each wing in a swooping pattern. Trim any excess from the sides.
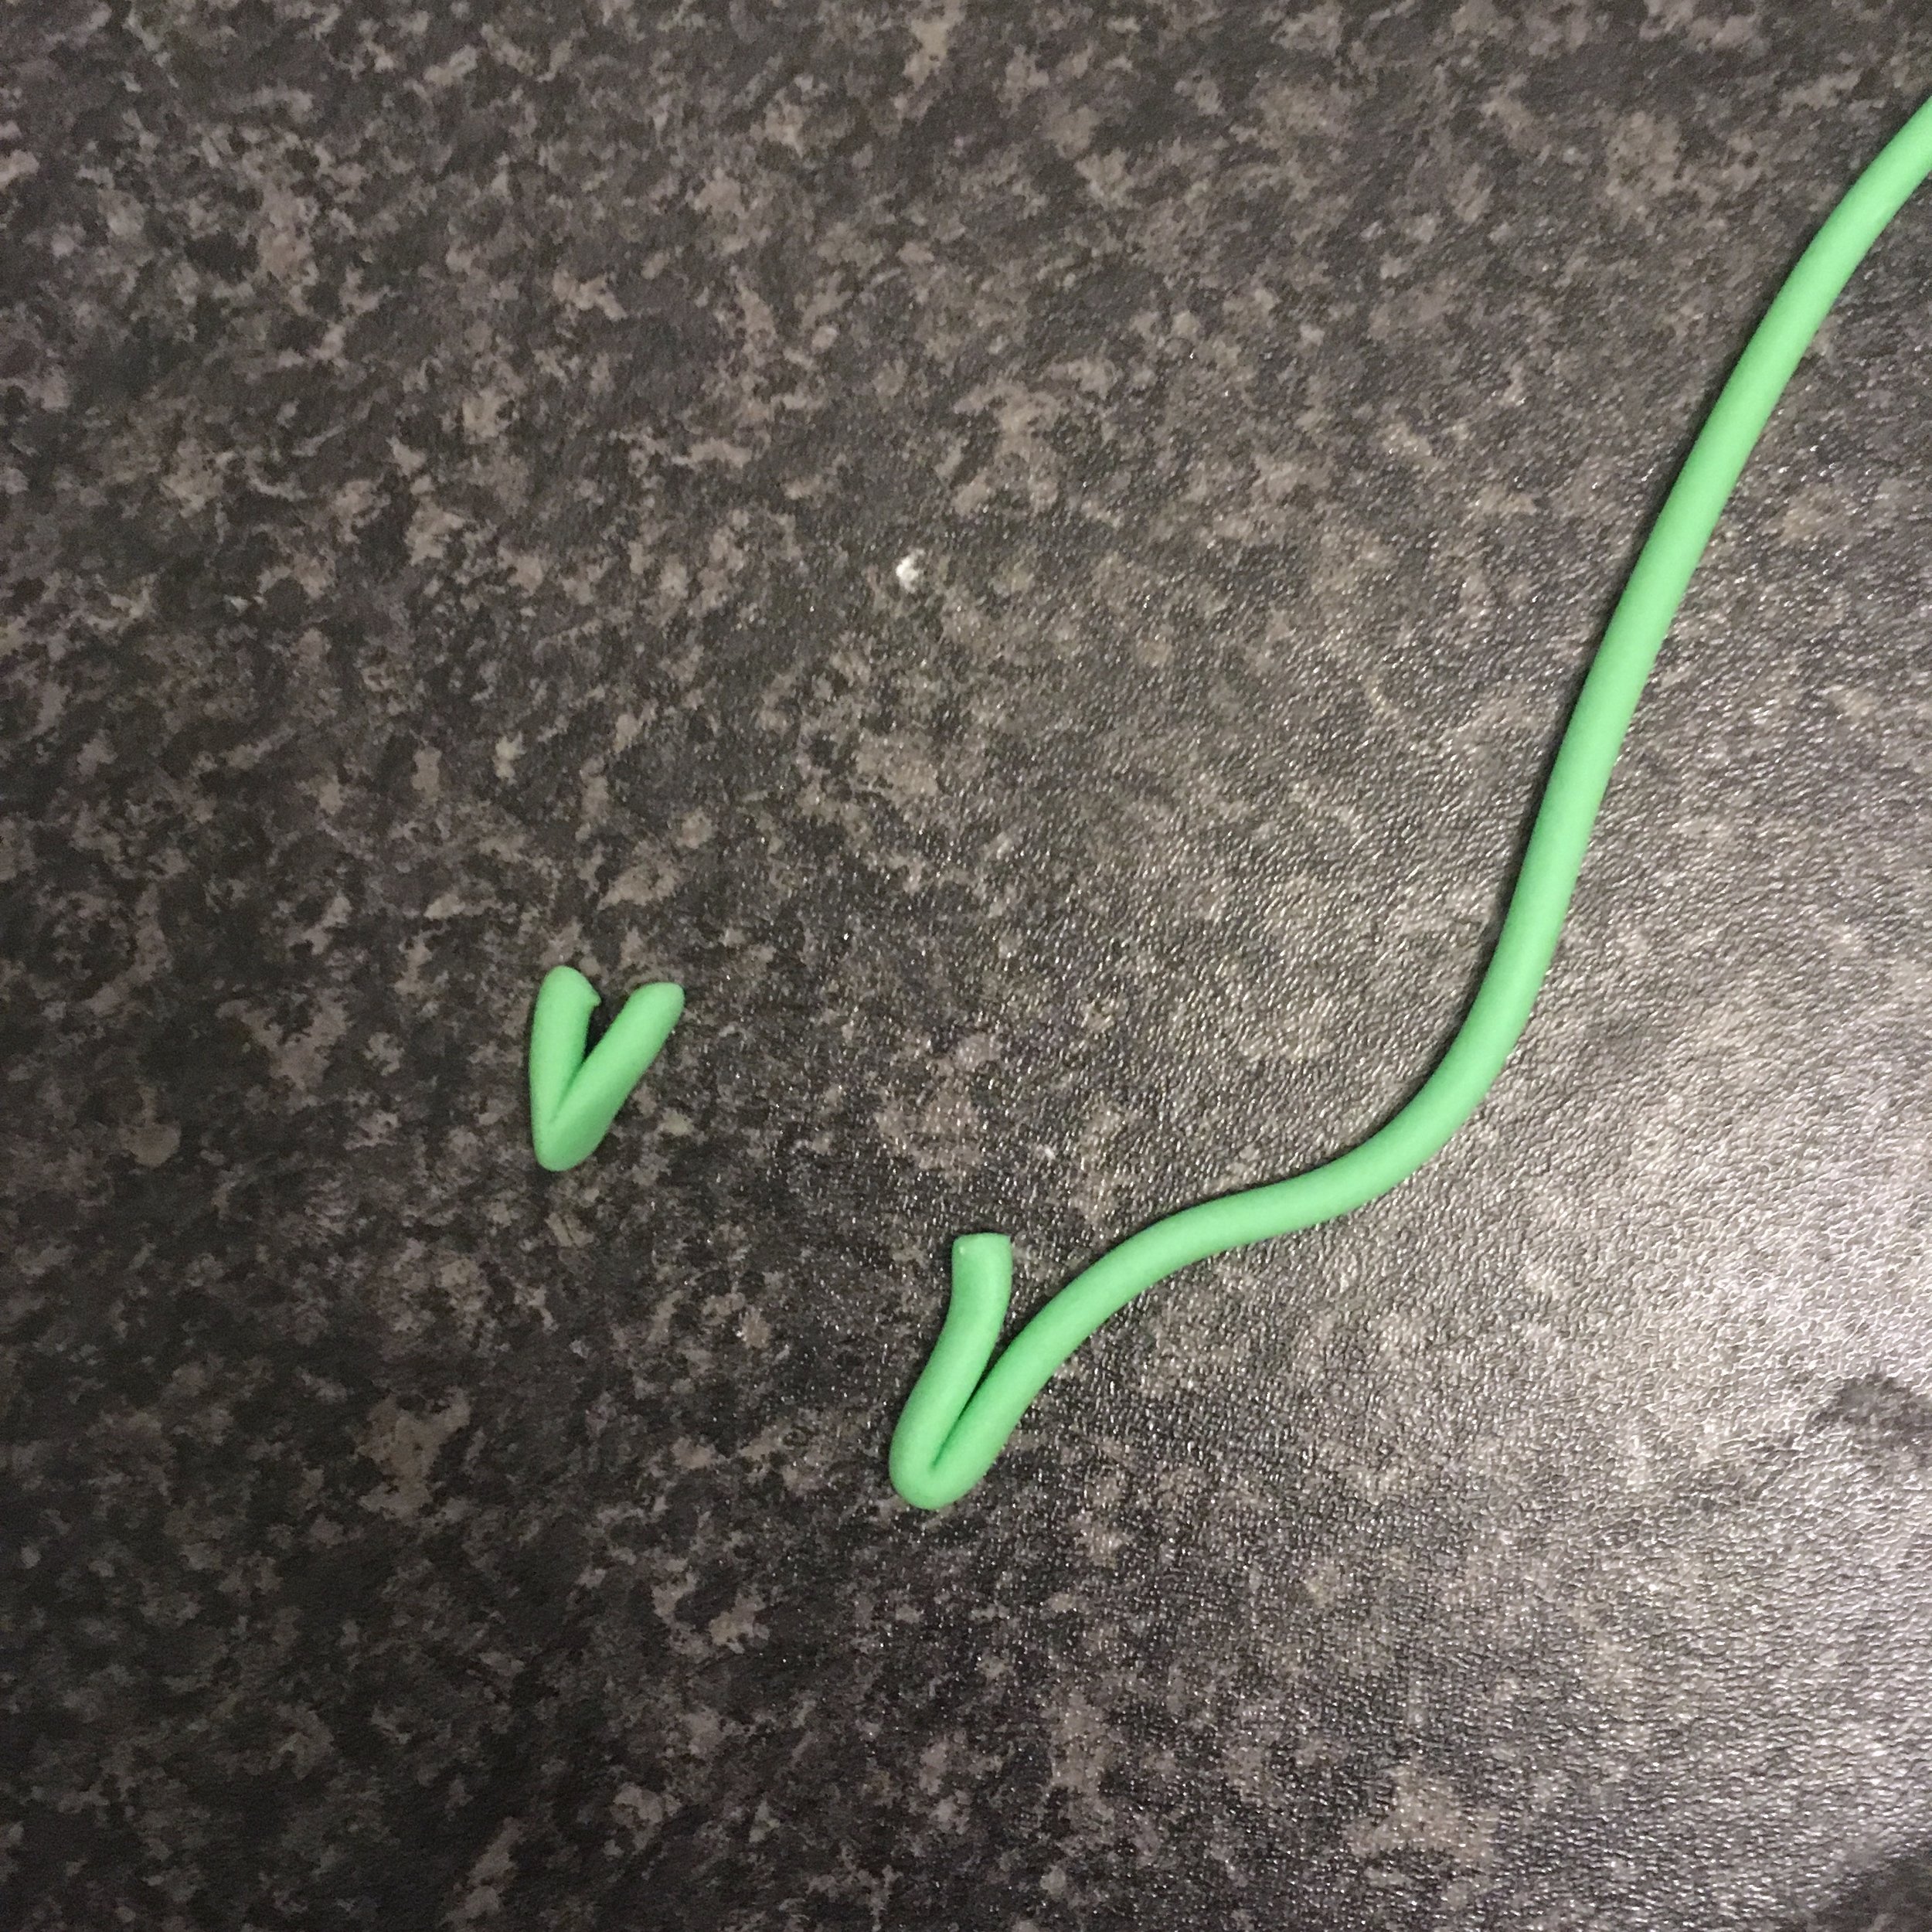
26. Roll another long thin green rope and pinch into small ‘V’s like we did on the eyes. Trim the tops to size and use your fingers to round out the edges. Add these to the bottom centre of the cake for her wee feathers.
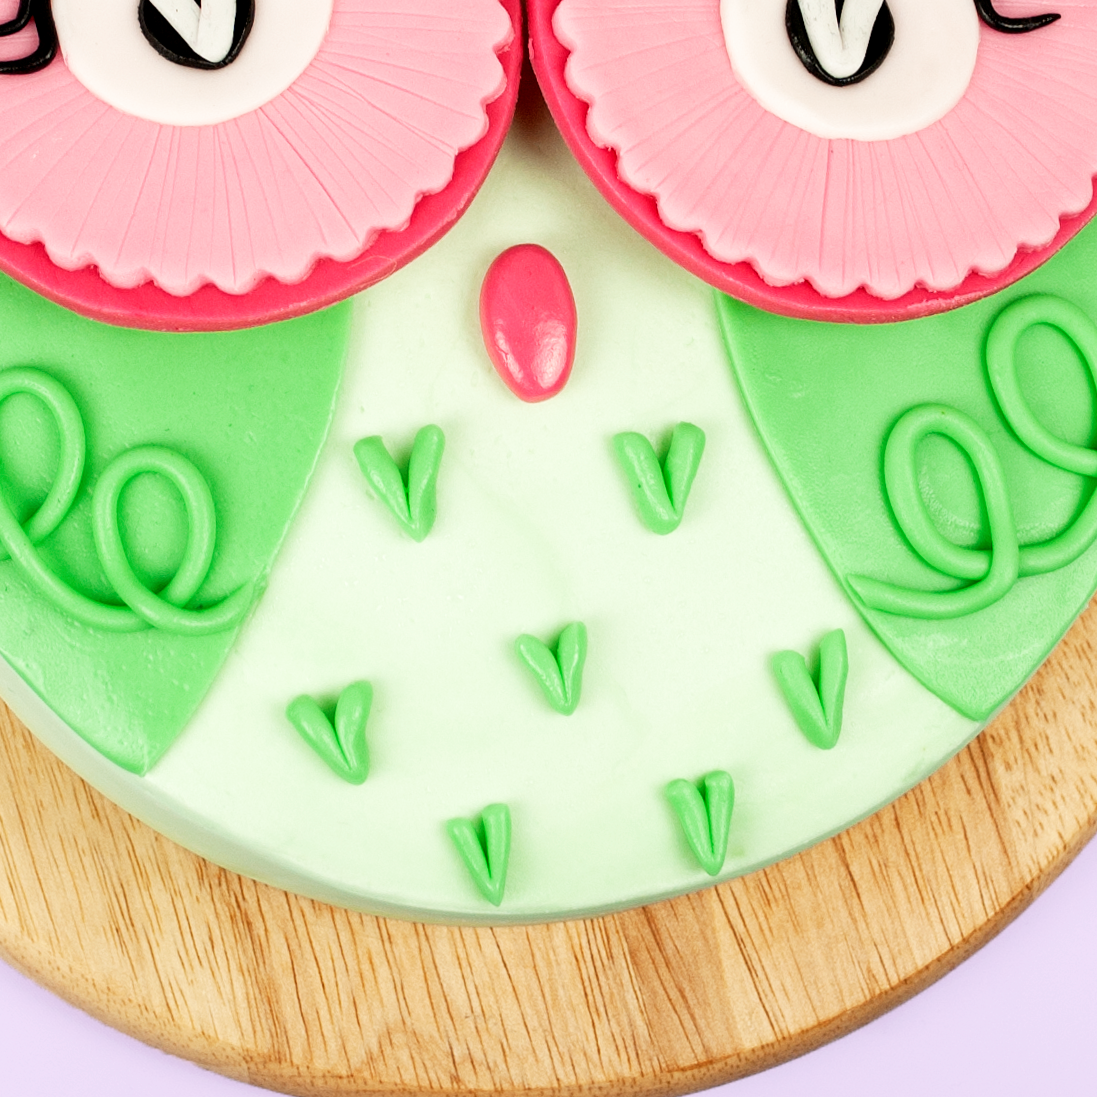
27. Finally, roll a small piece of dark pink fondant in the palm of your hand and shape it into an almond/beak shape. Add this to the centre of the cake.