Retro Iced Gem Cake Tutorial
Hey! How much are you loving this weather?? I read Glasgow was only 1°C cooler than Florida on Thursday, how insane is that?! But weather aside, you know there’s obviously one thing I love better than sunshine and that’s cake. Ahhh yeah, get in ma belly! This week I went a little bit nostalgic, tapping into my childhood favourites and when it comes to biscuits, right up at the top, it has to be the glorious Iced Gem. Remember when you were a kid and like the holy grail of biscuits was when there was more icing than biscuit? Well, in the ratio stakes, Iced Gems are winning every time and I loved them! I feel like I’m forgetting a biscuit though. We’ve had Jammie Dodgers and Custard Creams so far so what have I missed?? I need to complete this giant biccy project but I can’t put my finger on the final treat. Help a girl out would ya?
I’m gonna go ahead and rate this recipe more of an intermediate difficulty cos there are a few elements that can get a little tricky. I definitely had to take a lot of extra care on the fondant covering to get into all those ridges without any tears. If you’re more on the beginner side though you could maybe try using a pouring fondant or even a mirror glaze, I’d love to see your results!

I went with a pink finish cos I’m just a complete pink fiend, but you can absolutely mix it up. If I remember right the iced gem pack had every colour of the rainbow inside (albeit it in pastel shades). Ohh, if the party’s big enough you could make a whole packet, that would be the best damn dessert table you ever did see!
Ingredients
Cake
225g + 110g butter
225g + 110g sugar
225g + 110g self-raising flour
40g of plain flour
6 eggs
3 tsps of vanilla extract
6 tbsp of milk
Decoration
500g pink fondant
500g biscuit coloured fondant
200g white fondant
250g butter
100g cream cheese
500g icing sugar
Gel food colouring – pink and ivory
Method
1. Line two, 6-inch cake pans with parchment paper and pre-heat the oven to 180°C (160 Fan).
2. Cream together 225g of butter (room temperature) and 225g of sugar until it’s nice and fluffy. Gradually beat in 4 eggs one at a time until fully combined.
3. Mix in 4tbsp of milk and 2 tsp of vanilla extract.
4. Sift together 225g of self-raising flour and 40g of plain flour then fold these in to the wet mix. Split the mixture evenly between the two lined, 6-inch cake pans and bake in the preheated oven for 40-45 minutes or until a skewer comes out clean.
5. When baked, leave in the tin for 5-10 minutes before turning out onto a wire rack to cool completely.
6. This time line a 7.5-inch cake pan with parchment paper. This cake will be the biscuit base on our Iced Gem.
7. Cream together 110g each of sugar and butter and then gradually add in 2 eggs, one at a time. When fully combined, add 2 tbsps of milk and 1 tsp of vanilla and mix.
8. To the wet mixture, add 110g of self-raising flour and fold together. Pour the mix into the lined 7.5inch cake pan and bake at 180°C (160 Fan) for 25-35 minutes or until a skewer comes out clean.
9. Leave to cool in the tin for 5-10 minutes before popping it out and onto a cooling rack.
10. While the cakes are cooling, beat together 250g of butter and 100g of cream cheese. When smooth, add in 500g of icing sugar and mix well.
11. When you’re happy with the consistency add in pink food colouring and beat well. I find it’s best to use gel colouring as it doesn’t affect the icing, just the colour.
12. Once the cakes are cool, split each cake in half with a sharp knife so each cake has 2 layers.
13. Fill each of the layers with buttercream and stack all the 6-inch sponges on top of each other with buttercream in between (if you need to level off the tops, do this before stacking).

14. Use a sharp knife to carve the cakes. The smaller one should be rounded like a ball on top. The larger one, trim away the sharp edge on top so it’s more rounded in appearance.


15. Apply a thin layer of buttercream to the outside of both cakes and move to the fridge to chill.
16. While the buttercream is chilling, knead all the fondant for at least 10 minutes each as this will make it easier to work with.
17. Remove both cakes from the fridge and apply another, thicker coating of buttercream to both. Chill again for 30 mins.
18. When the cakes have chilled, roll the biscuit coloured fondant large enough to cover the bigger of the 2 cakes. Remove the larger cake from the fridge and mist with sterilised water.
19. Cover the large cake with fondant and trim the excess. Smooth over the top and sides with a fondant smoother.
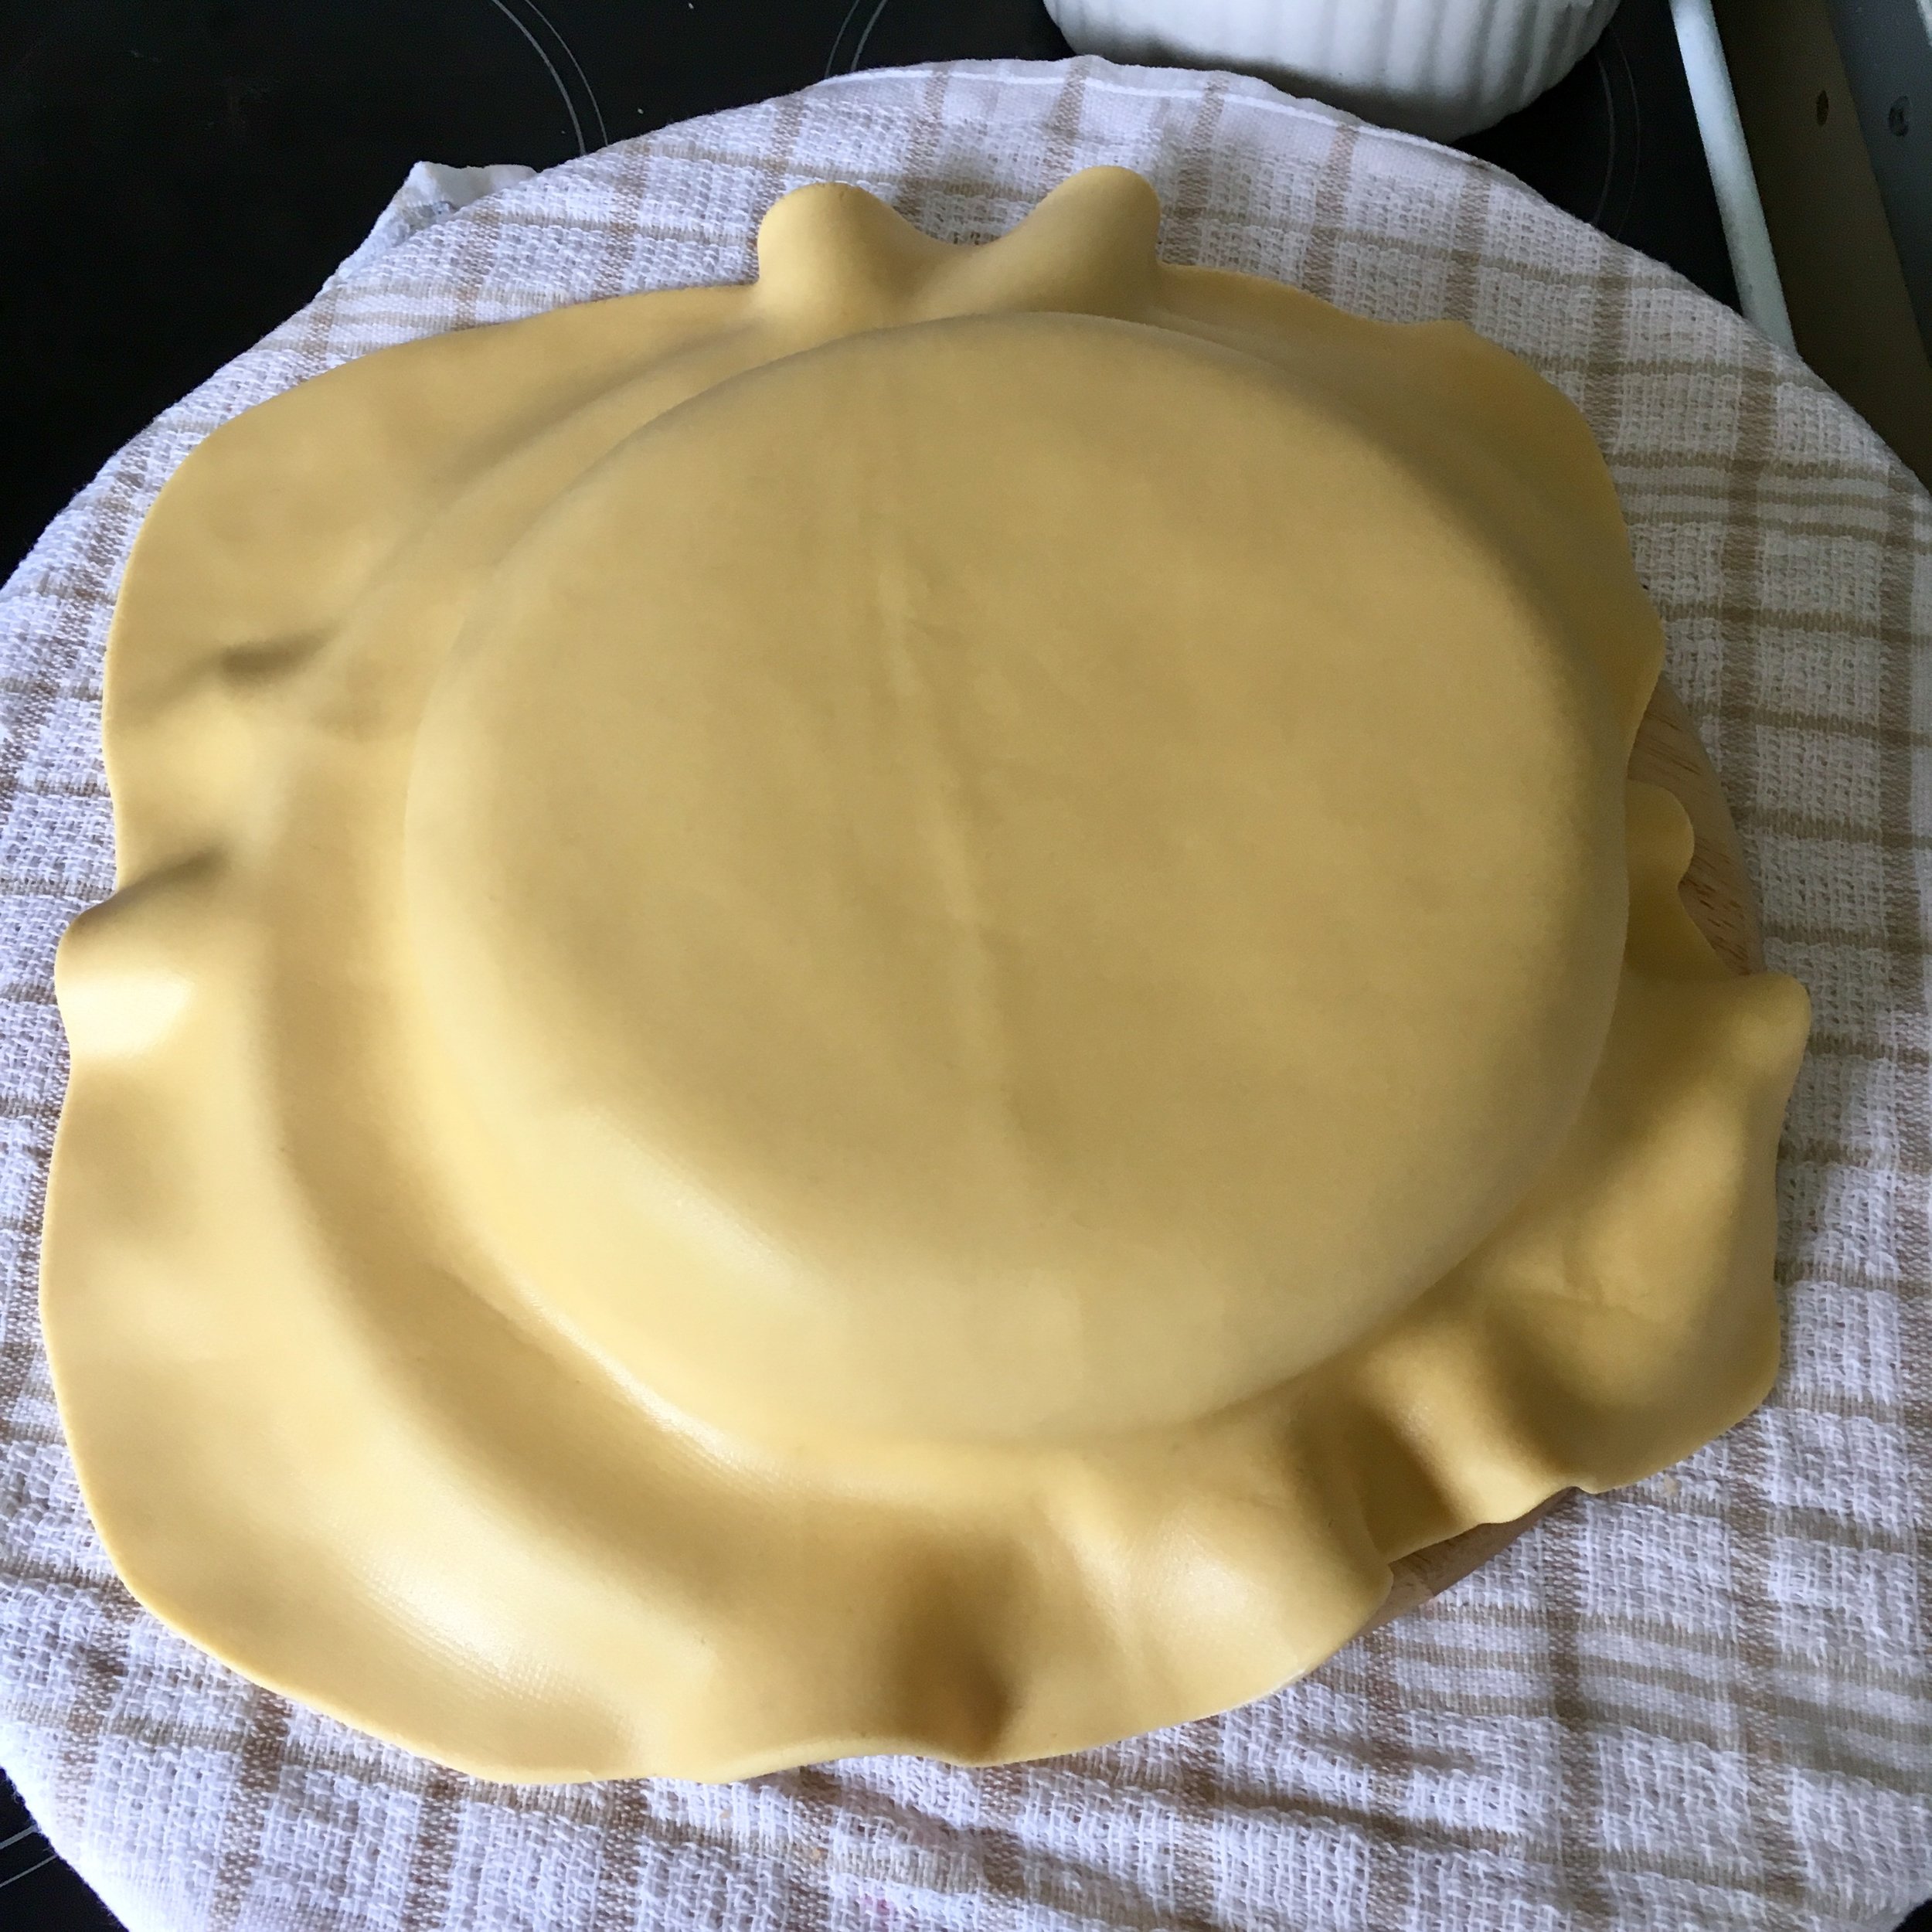

20. With the blunt side of a knife, gently push the fondant around the bottom so it goes slightly underneath the cake.
21. Using the handle of a paintbrush, push into the fondant in vertical strips to create the indents. Continue all the way around.

22. Next, remove a section of fondant from the top by running a knife roughly 1-inch in on all sides and lifting out the centrepiece. You don’t have to do this but if you have any guests who aren’t big on fondant this will make it easier for them to take it off and still enjoy the cake.

23. In a small dish, add a small squeeze of ivory food gel and 1 drop of water and mix together until its easily spreadable.
24. Apply this to all the indents using a food only paintbrush, blending out from the centre. This will help give it a little more depth. Move this cake to the side for later.

25. Tear off a small piece of pink fondant roughly the size of a golf and using your hands, press it into a mountain shape, with a peak at the top.

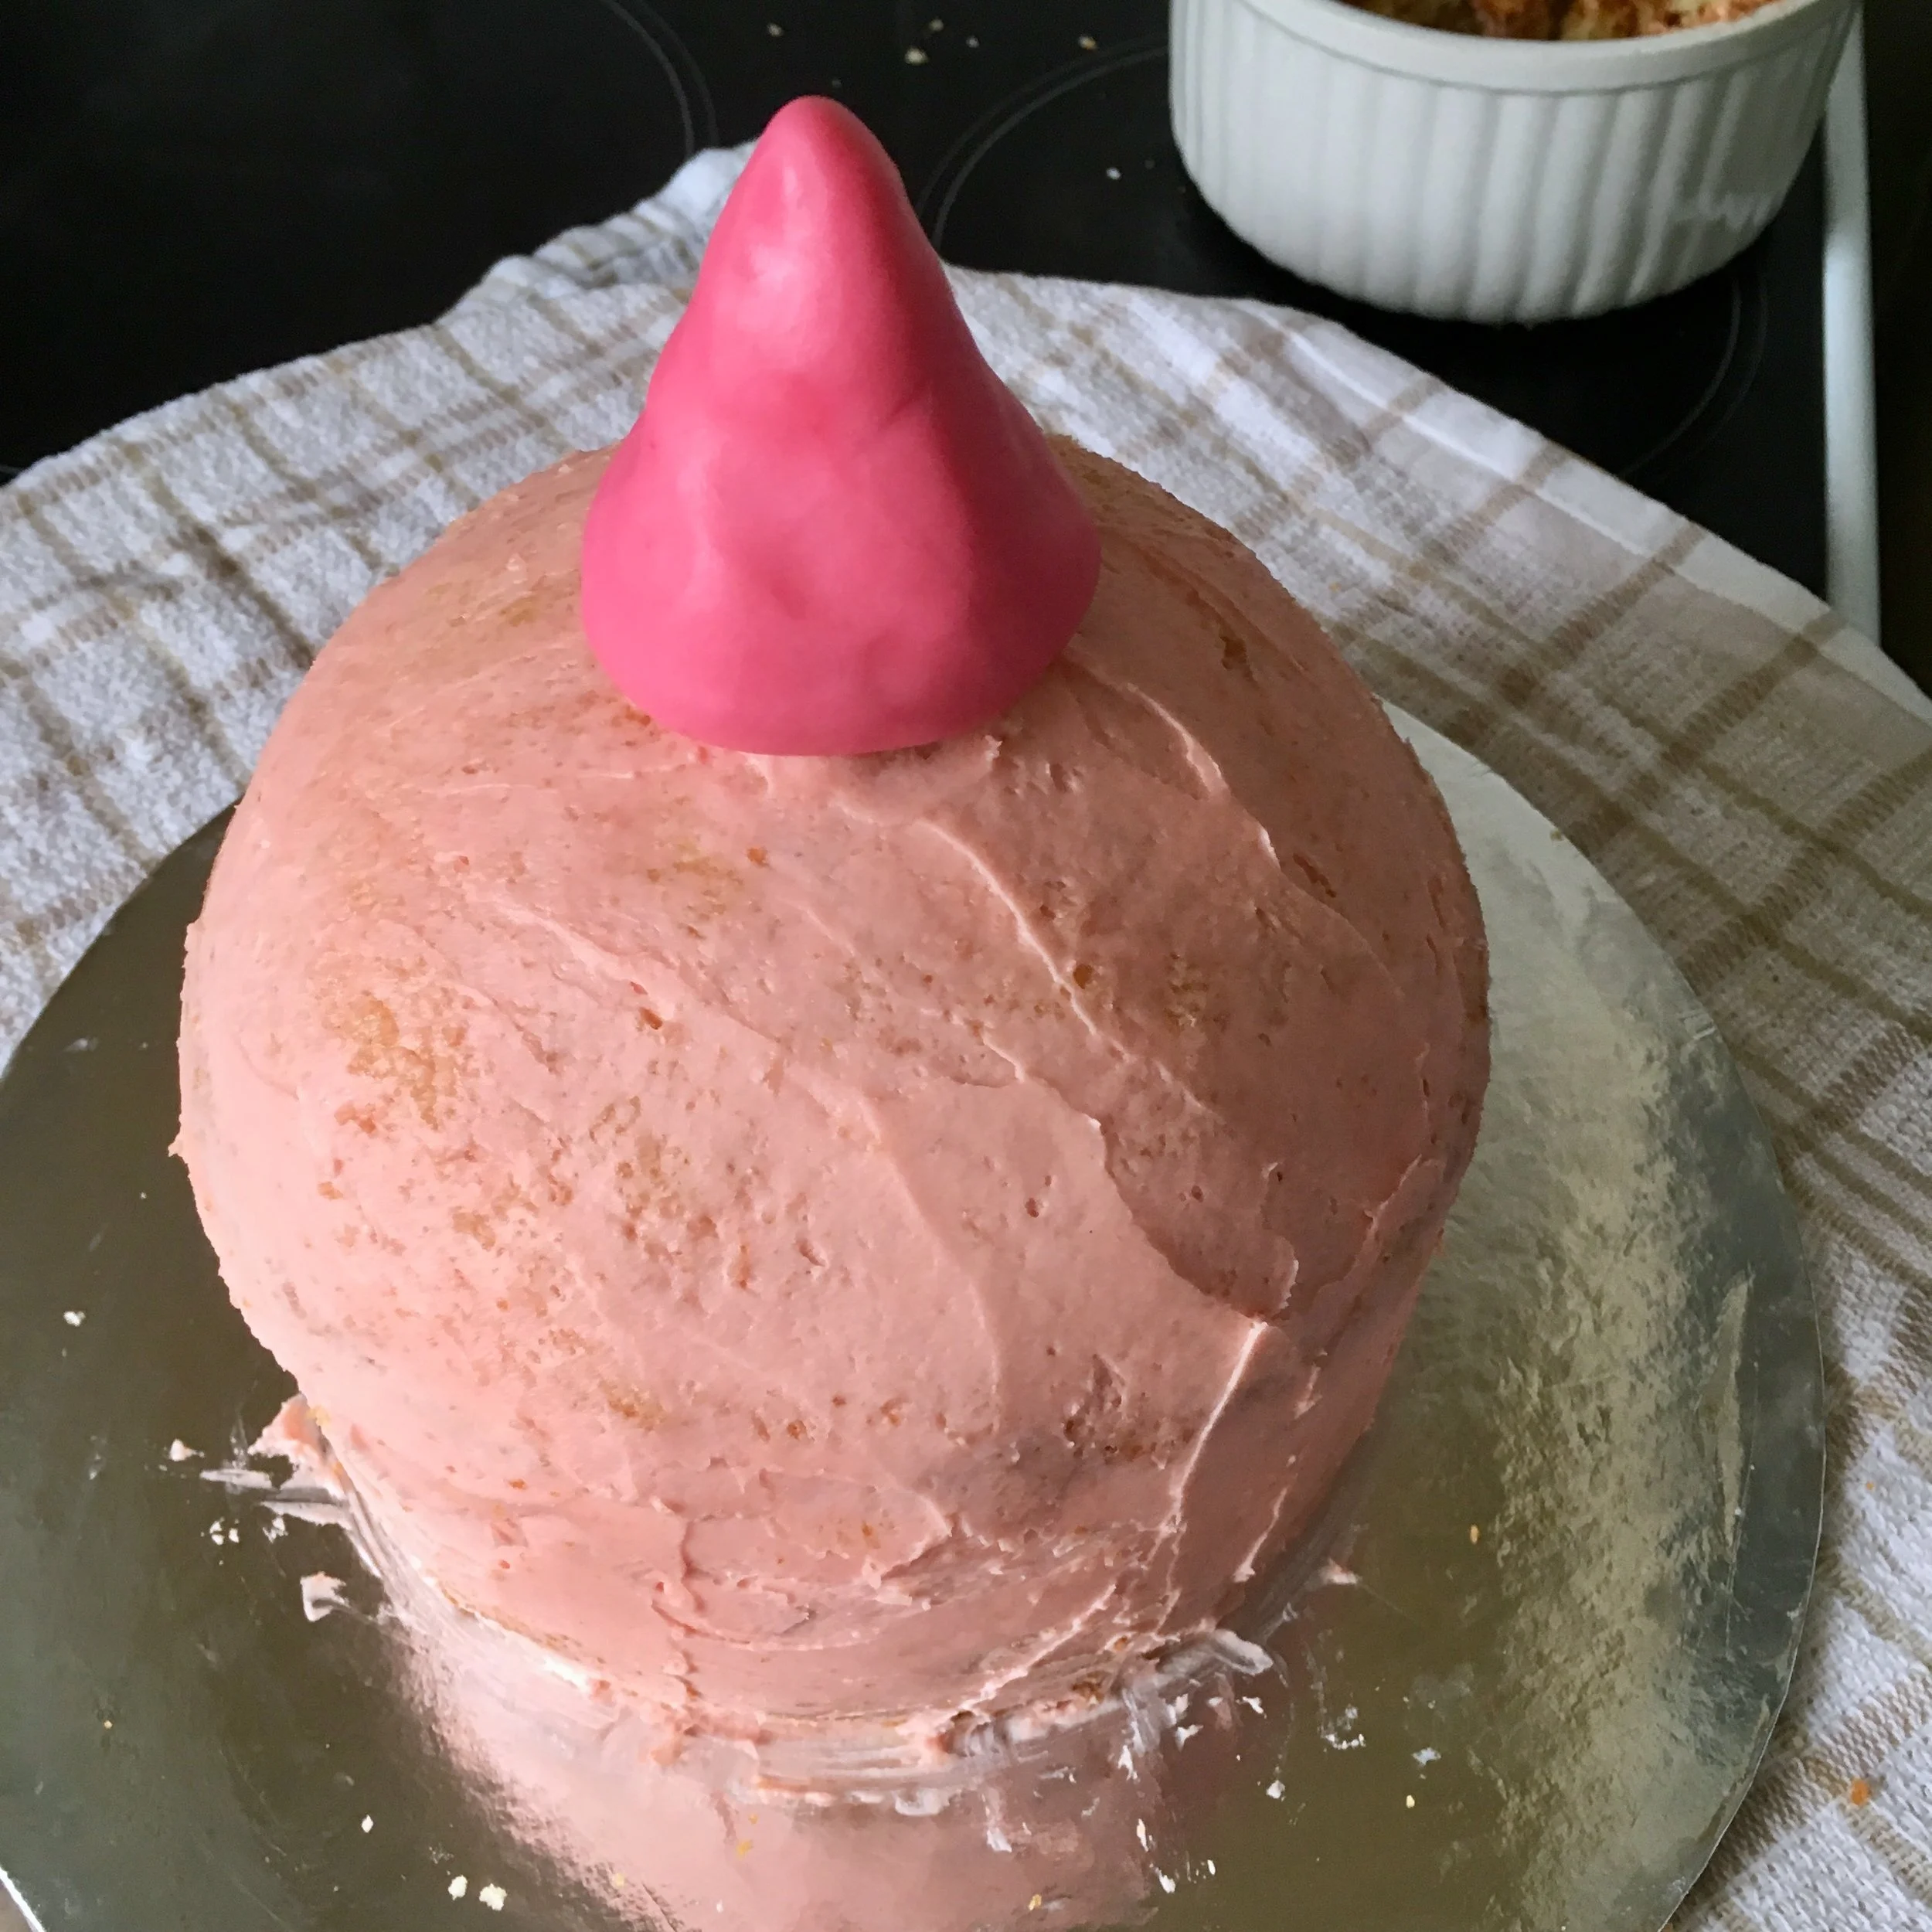
26. Attach the peak to the top of the small cake and use your fingers to blend it down so that the join becomes seamless (sorry it looks so rude, ha!).

27. Take the white fondant and split it into 9 equal pieces. Roll each piece into a long, thick rope.
28. Attach the white ropes to the smaller cake with a little water. Start at the top and then wind down in a spiral pattern. Repeat for all the ropes.


29. Now, with your thumb and forefinger, gently press the ropes to create a peak on the surface. Repeat for all 9. Return the cake to the fridge.

30. Roll the pink fondant large enough to cover the small cake.
31. Covering this cake is quite tricky so I’d suggest rolling it a little thicker than a standard cake. I found it best to wrap it around than go top down.
32. Attach one side of the fondant and then trim it into the edge of one of the ropes. Bring the remaining fondant around to meet it but don’t press it firmly into the join just yet.
33. Using your fingers, very gently press the fondant over all the ridges and take care to make sure the ridges are very defined.
34. When you’re happy with the ridges, it’s time to clean up the edges. Smooth the loose edge into the same ridge you pressed the other side into and trim the excess, try to stick as close to the inside edge of the ridge as possible. The ridge will act as a camouflage to hide the join.
35. Smooth along the join with your finger to gently buff out as much of the join as you can.
36. Trim any excess from around the bottom and again use the blunt edge of your knife to push the fondant slightly underneath the cake.
37. Transfer your biscuit base cake to your cake stand and attach with a little frosting.
38. Use another dollop of frosting on top of the base cake and lift your gem on top, the frosting should hold it in place.

And you’re done, congratulations! I think you’ve earned a massive pat on the back after that, what a cracker!