

Scandi Style, Potato Printed Cake

Wow this is weird to be back! If you come here often you might have noticed that I haven’t posted in a while. Like almost 4 months. Sheesh! I’m so sorry I just dropped out, it’s not cool. And I don’t have an exciting excuse. I just kinda lost my love of it for a little while there. It was starting to feel more like a chore than the hobby I love (so much!) and I thought to myself let’s just take a break, absence makes the heart grow fonder and all that. And boy, did it! I came back to the kitchen a few weeks ago and love love loved it! It was fun and exciting and very very cool to watch it all work they way I imagined it in my head. That little beauty was a really sweet looking cactus plant cake and if you drop by in a few weeks you can see it right here!
Today, I have the simplest (and most fun!) cake I’ve ever made to get us all back in the swing of things. I’ve been wanting to do a potato print cake almost since I started this blog. Right at the very beginning my original website wasn’t just cakes, it was crafts too. And one of my first projects was a potato print of Rene Magritte’s painting The Son of Man. That day I totally fell in love with the whole concept of potato printing as an adult. So. Much. Fun! But, then crafts veered off into just cakes so I thought ok, then one day I’m just gonna have to print a damn cake. Well here it is!

Full disclosure, the design is not me at all. My beaut sister Lynann has a photography and design business and the minute I decided to go forth with this idea I knew exactly the print of hers I had to base it on. I love the Scandi aesthetic, the simple design with big, bold impact brings me so much joy. Add in a sugar rush and it’s a dream come true. Please go check out her website here cos I swear, you’re about to have a new obsession!
Ok, shall we get a shift on?

Ingredients - Serves 12-15
3-4 hours (incl 1.5hrs chill time)
Cake
10oz butter
10oz sugar
5 eggs
10oz self-raising flour
5 tbsp boiling water
Decoration
6 tbsp raspberry jam
250g butter
500g icing sugar
1 tbsp cream cheese
1tbsp lemon juice
Icing whitener (amount varies)
1 sweet potato
Black gel food colouring
Edible paint maker
Method
Cake
1. Line two 6-inch cake pans with parchment paper and preheat the oven to 180°C/160Fan.
2. In a large bowl, whisk together 10oz of sugar and 10oz of butter until pale and fluffy. To this, add 5 eggs (lightly beaten), 10oz self-raising flour and 5 tbsp of hot water (from the kettle). Mix together until just smooth.
3. Split the batter between the two cake pans and bake for 35-40 minutes or until a skewer comes out clean. Leave the cakes to cool in the pans for 5 minutes before turning out onto a wire rack to cool completely.
Decoration
1. When the cakes have cooled, use a sharp knife to carefully even the tops so they are flat. Next, split each into two even layers.
2. In a large bowl, cream together 250g of butter, 1 tbsp of cream cheese, 500g of sifted icing sugar and 1 tsp of lemon juice. It’s worth spending some time here making sure that its well beaten, the more you mix, the less grainy it will be. As you’re mixing, gradually add small amounts of the icing whitener until you reach the desired colour (or lack of in this case).
3. Once beaten, if you have a stand mixer, leave the buttercream mixing on the lowest speed with the paddle attachment for 5-10 minutes. If not, use a palette knife to work the icing against the side of the bowl for 5-10 minutes. This will work out any air bubbles.
4. Build the cake on a board or stand by smearing the base with a little buttercream and placing the first layer on top. Next, add 2tbsps of raspberry jam atop the cake. Repeat until all the layers are stacked with jam in the middle. Be sure to make the top layer one of the bases, with the bottom facing up so you get the flattest surface possible on top.
5. Cover the entire cake with a thin layer of buttercream, smooth down the sides with a bench scraper and place in the fridge for 30 minutes.
6. While the cake is chilling, cut your sweet potato in half. Carefully, using a sharp knife, carve a squared cross into one of the potato halves. Once you’re happy with the shape, soak in a bowl of cold water for 10 minutes.

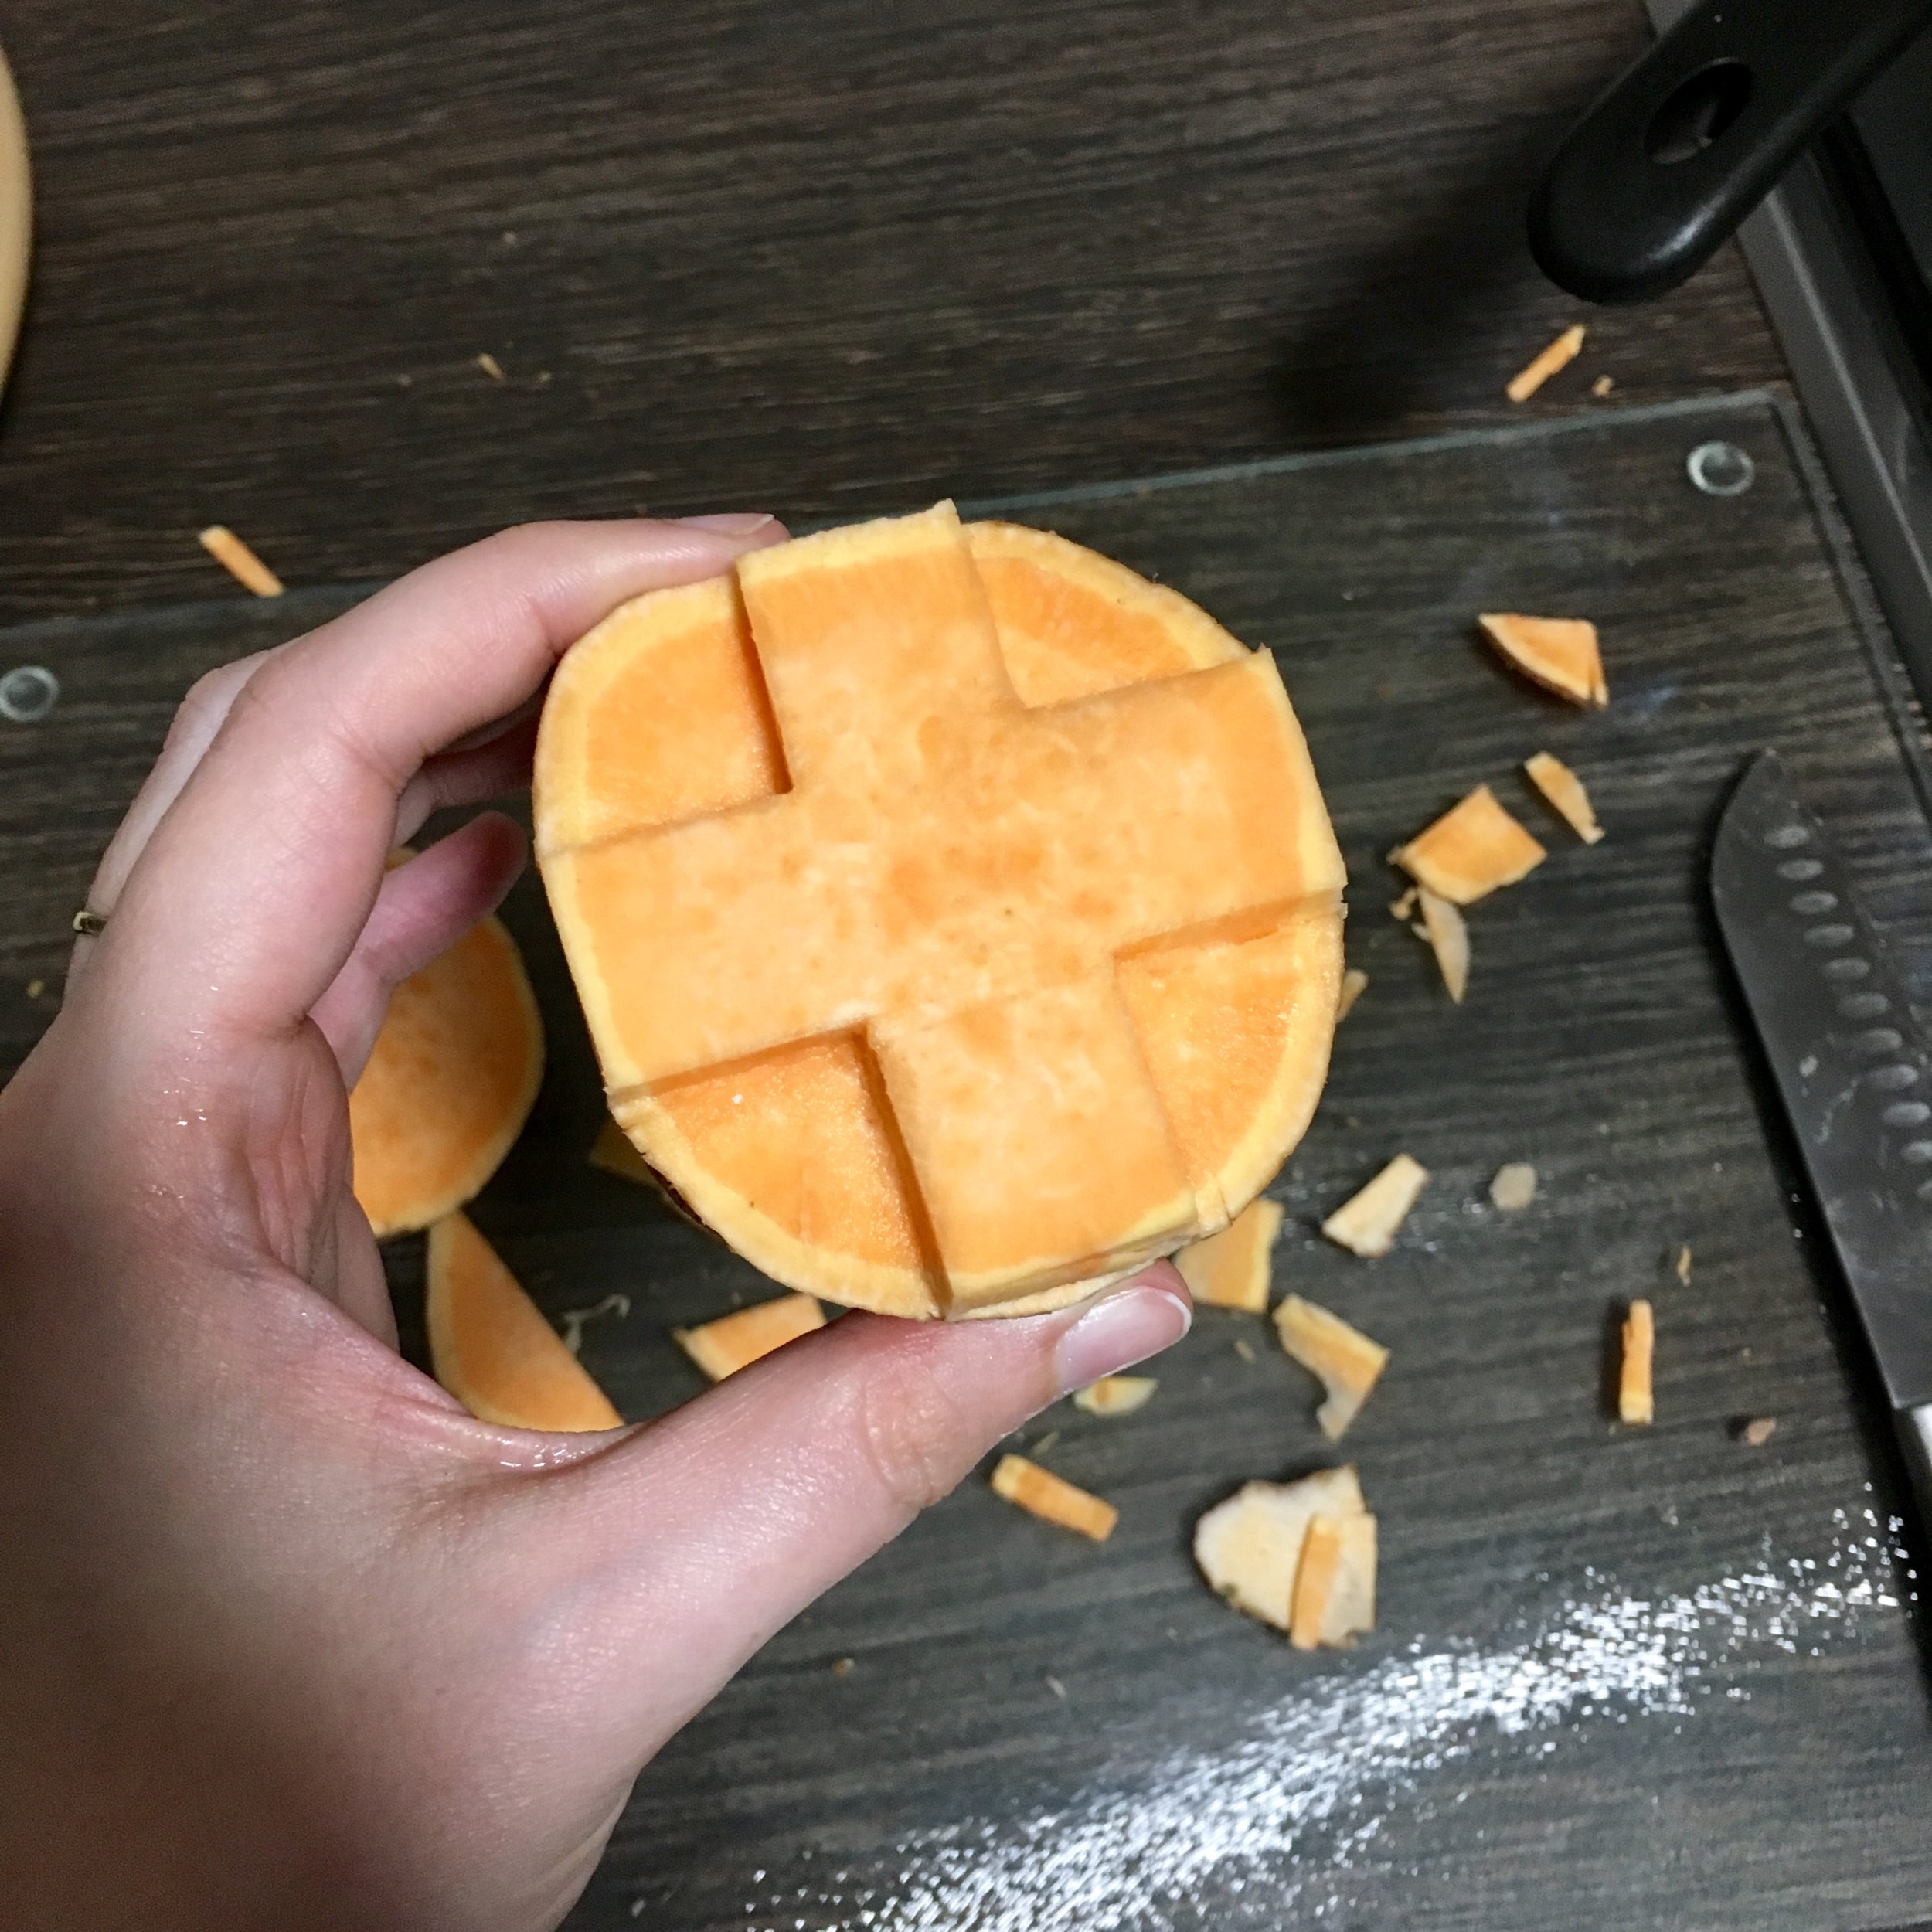
7. After 10 minutes, remove the potato from the water and pat dry with kitchen paper. We want to dry it off as much as possible otherwise it will dilute the food colouring.
8. When the cake has chilled and the crumb coat is hard, apply another thicker coat of buttercream all over, starting with the top. Carefully smooth out the icing with a bench scraper until the sides are smooth. I opted for a rustic look on top. To achieve this, I left any icing that had accumulated around the circumference of the top but used a small palette knife to gently smooth down the centre. In the same vein as the royal wedding cake. I personally love this trend. Number one its goooooorgeous and number two, I do not enjoy spending hours trying to get those sharp edges up top. I’m gonna be all about this finish for a while I think.
9. And we’re back to the fridge to chill for at least 30 minutes. Take a seat, have a cuppa and biscuit. You’ve earned it.
10. Once the cake has chilled, mix up some edible grey paint on a flat plate using a little black food colouring, edible paint mix powder (I use PME mix ‘n paint) and if necessary, a touch of lemon juice/water. Try to get the consistency for this halfway between liquid and gel colouring. Think sticky but still fluid, sticky enough that it’s not going to run right off that buttercream.
11. Dry off your potato stamp one last time and then dip it into your grey paint. Check the cross is fully covered in paint, if not you can add a little extra with a clean (food-only) paintbrush. Press the potato against the cake in the centre, being careful to follow the curve of the cake. Remove the potato and place it to the side for later.

12. Fold a piece of kitchen paper and gently dab around the grey cross to smudge it outward. Smudge roughly until 1.5cm outside the original cross on all sides, adding more paint where necessary. Repeat until you have four smudged, grey crosses equidistant from each other around the sides of the cake.

13. Now prep a new plate with black food colouring, thinning with a drop of lemon juice/water. Aim for the same consistency as before, fluid but sticky. Pat dry your potato to get as much grey food colouring off as possible but don’t worry too much. This time dip your potato into the black food colouring and press against the cake. Aim for the original grey cross you made earlier; you should be able to see a tiny indent under the grey. Repeat for the three other crosses.


I told you it was easy right?! See you next week where I will be full on gushing about my new status as Plant Lady in residence. Cos Cat Ladies are so last year.


