Retro AF Cassette Tape Cake (a MixCake if you will)

Happy Valentines day when it comes! Or Galentines, if like me your taste in men makes you hella appreciate the ladies in your life. I’m genuinely considering letting a panel of friends select my next date because I cannot be trusted! But whether you’re celebrating your beloved or beloved friends I got the cake that shows you care. Enter the Valentines MixCake. Which is especially cool cos you can tailor the label suit your special person. It’s the easiest bespoke cake you’ll ever make, trust me.

Inside I’ve got a classic lemon tray bake cos I figured a little zing on the palette was fitting for such a day. It can easily be subbed for vanilla if you’d rather (nudge nudge wink wink). I’ve upped the flour to everything else ratio to give it a little bit more stability, closer to a Madeira than a Vicky sponge with a little added sugar syrup to help it stay moist longer. I’m leaning sharp with the syrup to balance the sweetness in the fondant but if you have a really sweet tooth you can take this down a notch by subbing some of the lemon juice in the syrup with water.
Quick reminder before we get started, as usual this is very beginner friendly. Super simple shapes is how I roll. I went with a classic pink and red given the theme but if you’re the blue kind? This cake can be completely switched up to match your décor or your paramour.
Shall we get caking?
Ingredients – Serves 16-20
Cake
225g butter (room temperature)
225g sugar
275g self-raising flour
2 tsp baking powder
4 medium free-range eggs
2 lemons (unwaxed)
1 tbsp milk
Sugar Syrup
Juice of 2 lemons
3 tbsp sugar
Decoration
500g icing sugar
250g butter (room temperature)
650g pink fondant
150g white fondant
Edible black pen
Red and black food colouring (gel)
Piping gel (optional)
Method
Line a 32cm traybake tin with parchment paper and preheat the oven to 160°C.
In a large bowl mix together 225g of butter and 225g of sugar with an electric whisk until pale and fluffy.
In a separate bowl sift together 275g of self-raising flour and 2 tsp of baking powder. I don’t often sift flour but because we’re adding the baking powder, sifting them together helps it to evenly distribute.
Add the flour, baking powder, 4 eggs, the zest of 2 lemons and 1 tbsp of milk to the bowl containing the butter and sugar and mix until there are no lumps.
Transfer the mixture to the lined tray and bake for 30-35 minutes or until a skewer comes out clean. Remove from the oven and allow to cool slightly in the tin for 5 minutes.
Juice the zested lemons and take out 3 tbsp of the lemon juice. Leave this to the side for later, we’ll use it in the buttercream. Transfer the remaining lemon juice to a small saucepan and add 3 tbsp of sugar. Stir the mixture over a medium heat until all the sugar has dissolved, and the mix is coming to a simmer. Remove from the heat.
Returning to the cake, carefully flip it upside down in the pan. The reason I’m doing this, is because later we’re going to trim the top of the cake to level it and we’d lose some of the syrup-y goodness. When the cake is upside down and back in the pan, prick it all over with a skewer or cocktail stick. Spoon the syrup evenly all over so that it soaks down through the pinpricks and all over the cake. Leave it to cool completely in the pan.
While the cake is cooling, whisk together 250g butter (room temperature), 500g icing sugar and the 3 tbsp of lemon juice that we put aside earlier. The longer you whip it, the smoother it will become. If you have time, it’s even better if you sift in the icing sugar slowly but I know we all got busy weeks on the go. The frosting should be fluffy but hold its shape, if it’s very stiff however you can add a small drop of water until it becomes spreadable.
When the cake is completely cool, remove it from the tin and turn it the right way up again (the perfectly flat side should be face down on the counter). Using a sharp serrated knife trim the top until it’s flat (and eat the scrap pieces, trust me).

Grab your cake board or plate (I’m using a glass chopping board I picked up from Sainsburys) and smear a little of the buttercream in the middle. Place the cake on top and centre, carved side down. Place in the fridge to cool for 5 minutes.
Remove from the fridge and apply a thin crumb coat of buttercream all over. This should pick up the crumbs and help hold them in place so don’t worry too much about neatness at this point. Return the cake to the fridge for 30 minutes.


Remove the cake from the fridge and coat with another layer of buttercream, thicker this time. Use a palette knife to smooth the sides. Return to the fridge for another 30 minutes.
Remove the cake from the fridge and smooth any last bumps or dents. I like to do this by heating a palette knife in a cup of boiled water, drying it off and then quickly smoothing it over the cake. Be careful to work fast though or you might create more dents than you smooth. But you know what they say, practice makes perfect. Return the cake to the fridge.
While the cake is chilling, roll out 650g of pink fondant to 2mm thick. It should be large enough to cover the entire cake plus 2-3cm each side. I find the easiest way to do this is on a silicone mat. Once rolled, you can place the fondant (still attached to the mat) on the cake and peel the mat away gradually. If you don’t have one though, a light dusting of cornflour or icing sugar should stop it sticking to the counter. Once the fondant is rolled big enough, smooth it over with a fondant smoother. I have a super cheap one from the pound store and it’s never let me down.


Remove the cake from the fridge and apply a little piping gel along all the edges, this will help the fondant stick. If you don’t have any piping gel you can always spritz the cake with a little sterilised water. Cover the cake with the pink fondant and gently work it on to the cake, starting with all the corners. Gently ease the fondant into place while lifting slightly from the bottom until it’s completely smooth. You can help this along with a fondant smoother, gently swiping and buffing over all the sides.


When the cake is covered and the fondant is smooth and secure, carefully trim the excess. I do this really gradually and slowly as fondant has a tendency to shrink back. When you have finished trimming, use the blunt side of your knife to carefully push the bottom of the fondant under the cake a little, tucking in the seams. Move the cake to the side but don’t put it back in the fridge from here on out in the decorating process. Fondant that’s been in the fridge has a tendency to sweat making it really difficult to work with.
Gather up the pink trimmings and work them back into a ball, cover with cling film. Create a template on parchment paper by marking out parallel lines, the top line needs to be 19cm, the bottom line 23cm and the width between both, 5cm. Join them up like the picture below and cut out with scissors.
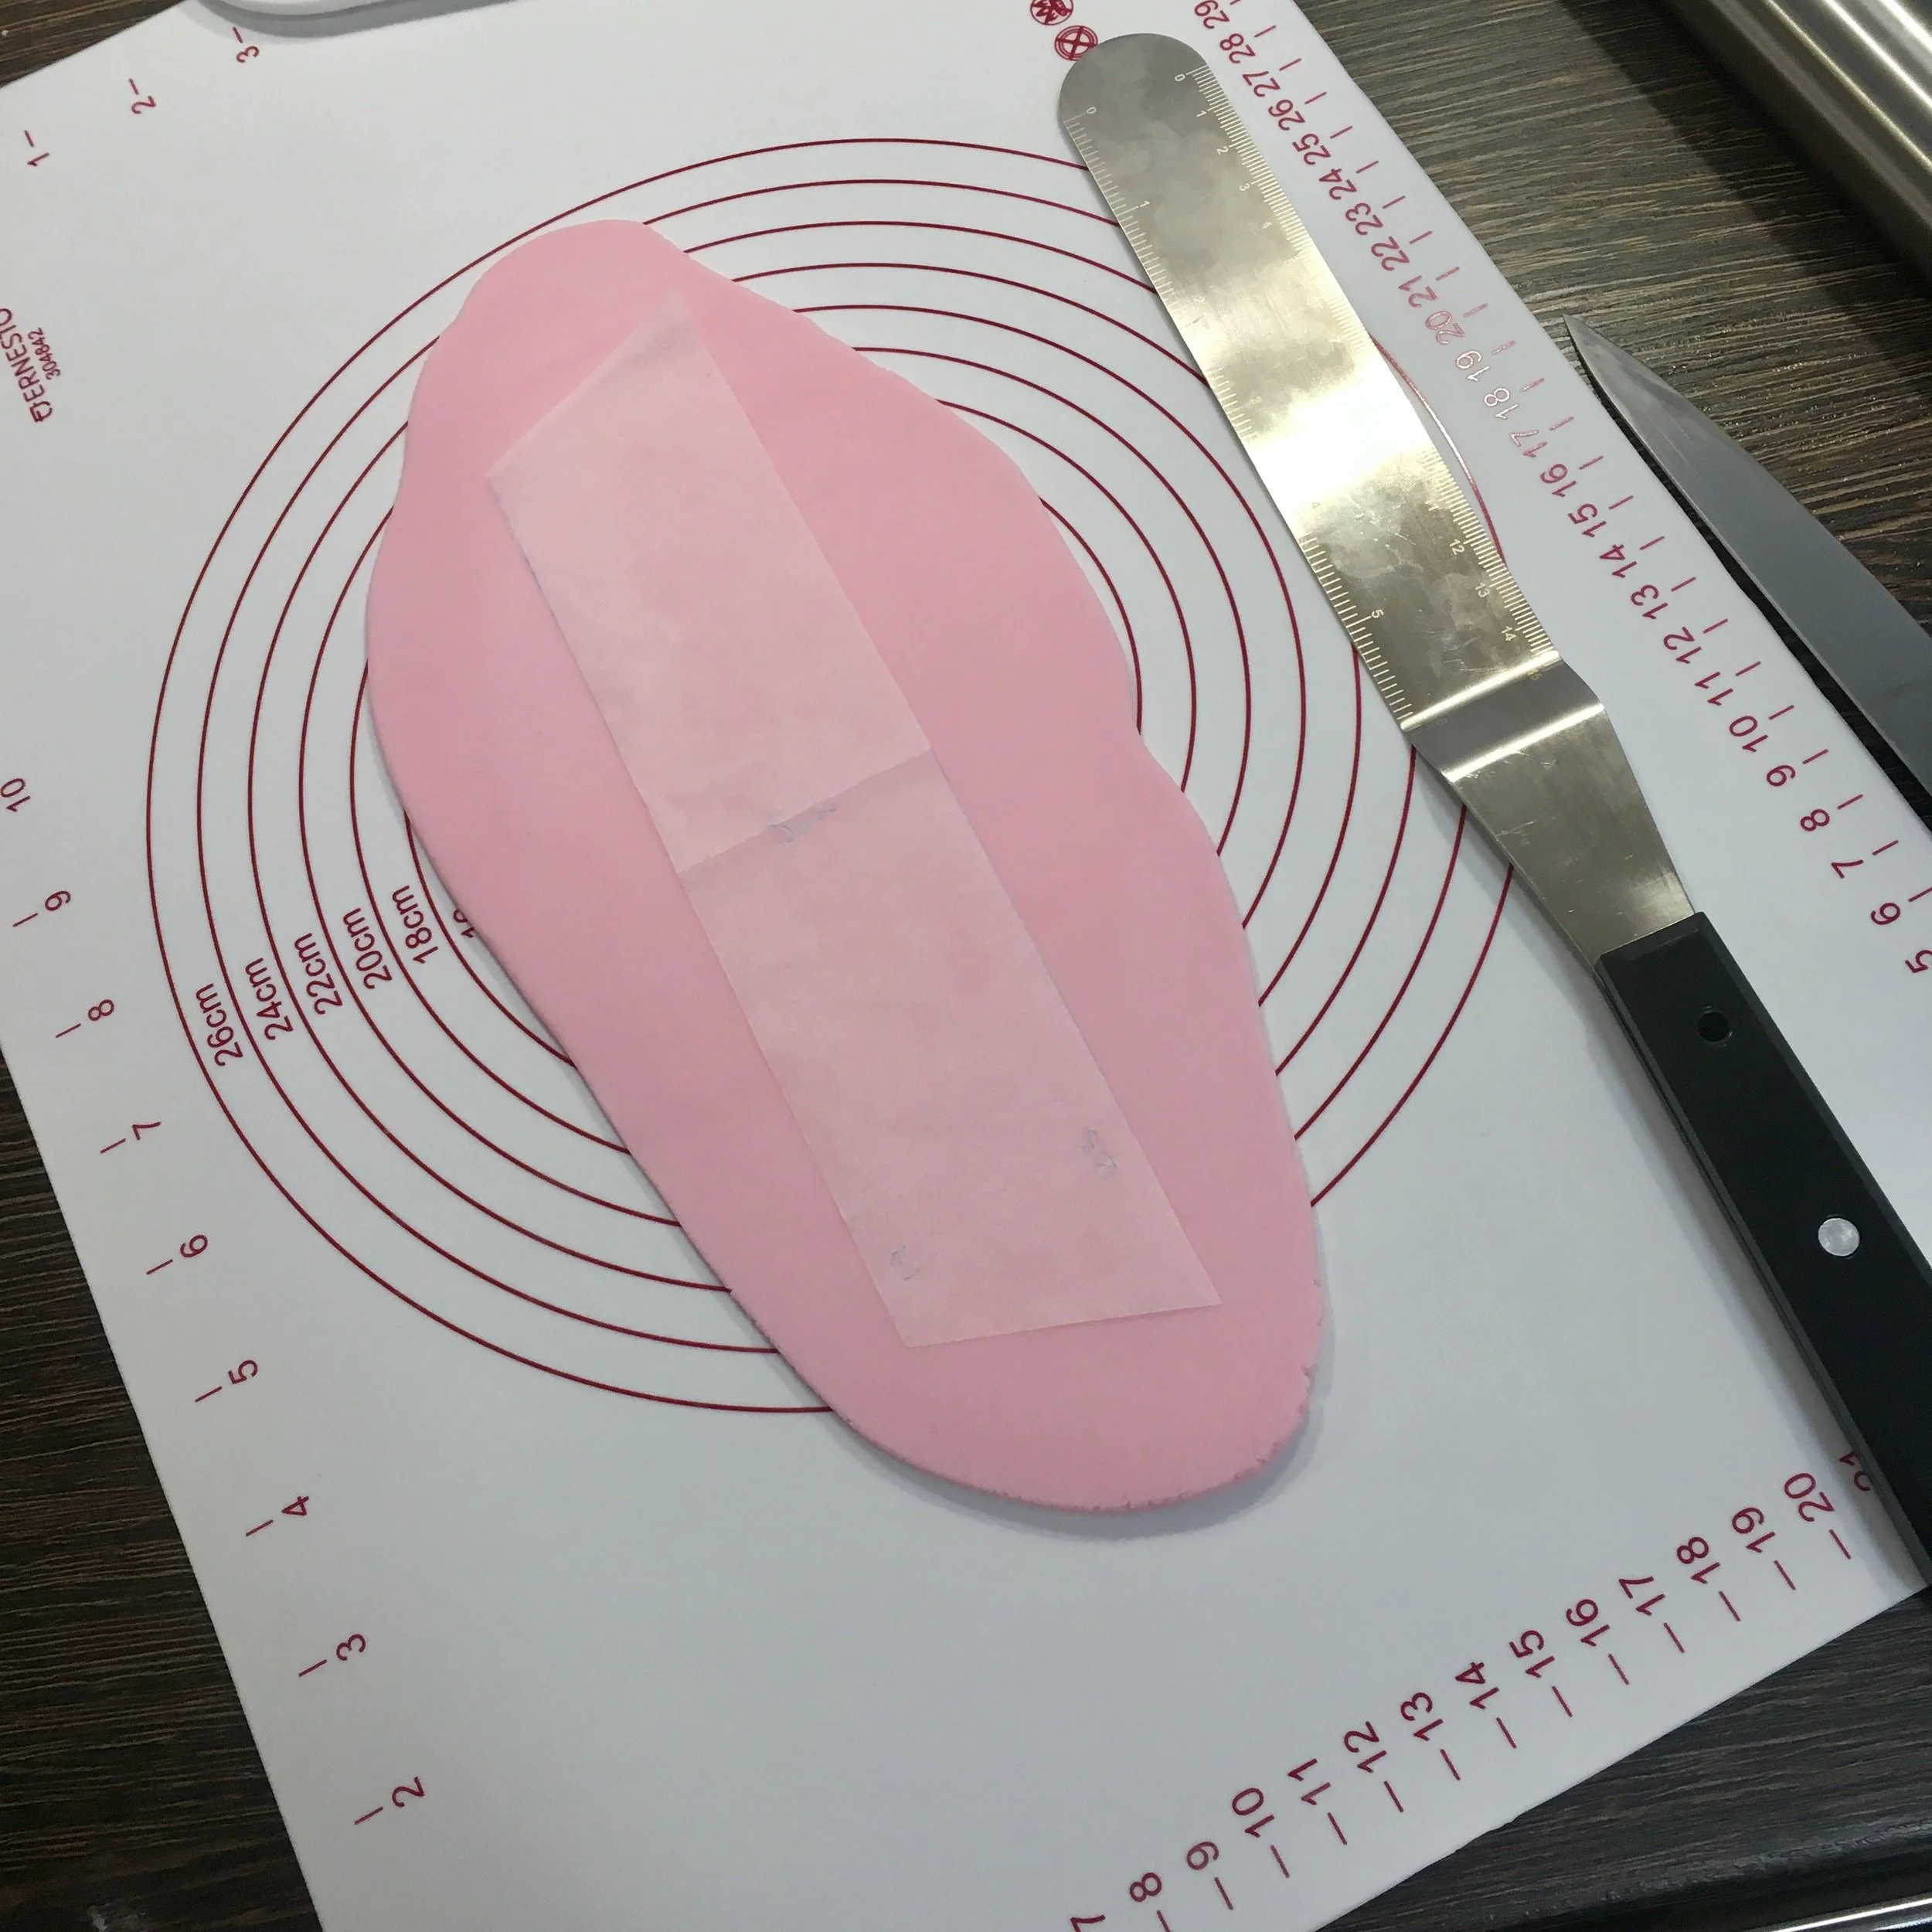

Roll the remaining pink fondant so that its 3mm thick. Place the parchment template on top and cut around. Leave it to stiffen a little for about 5 minutes.
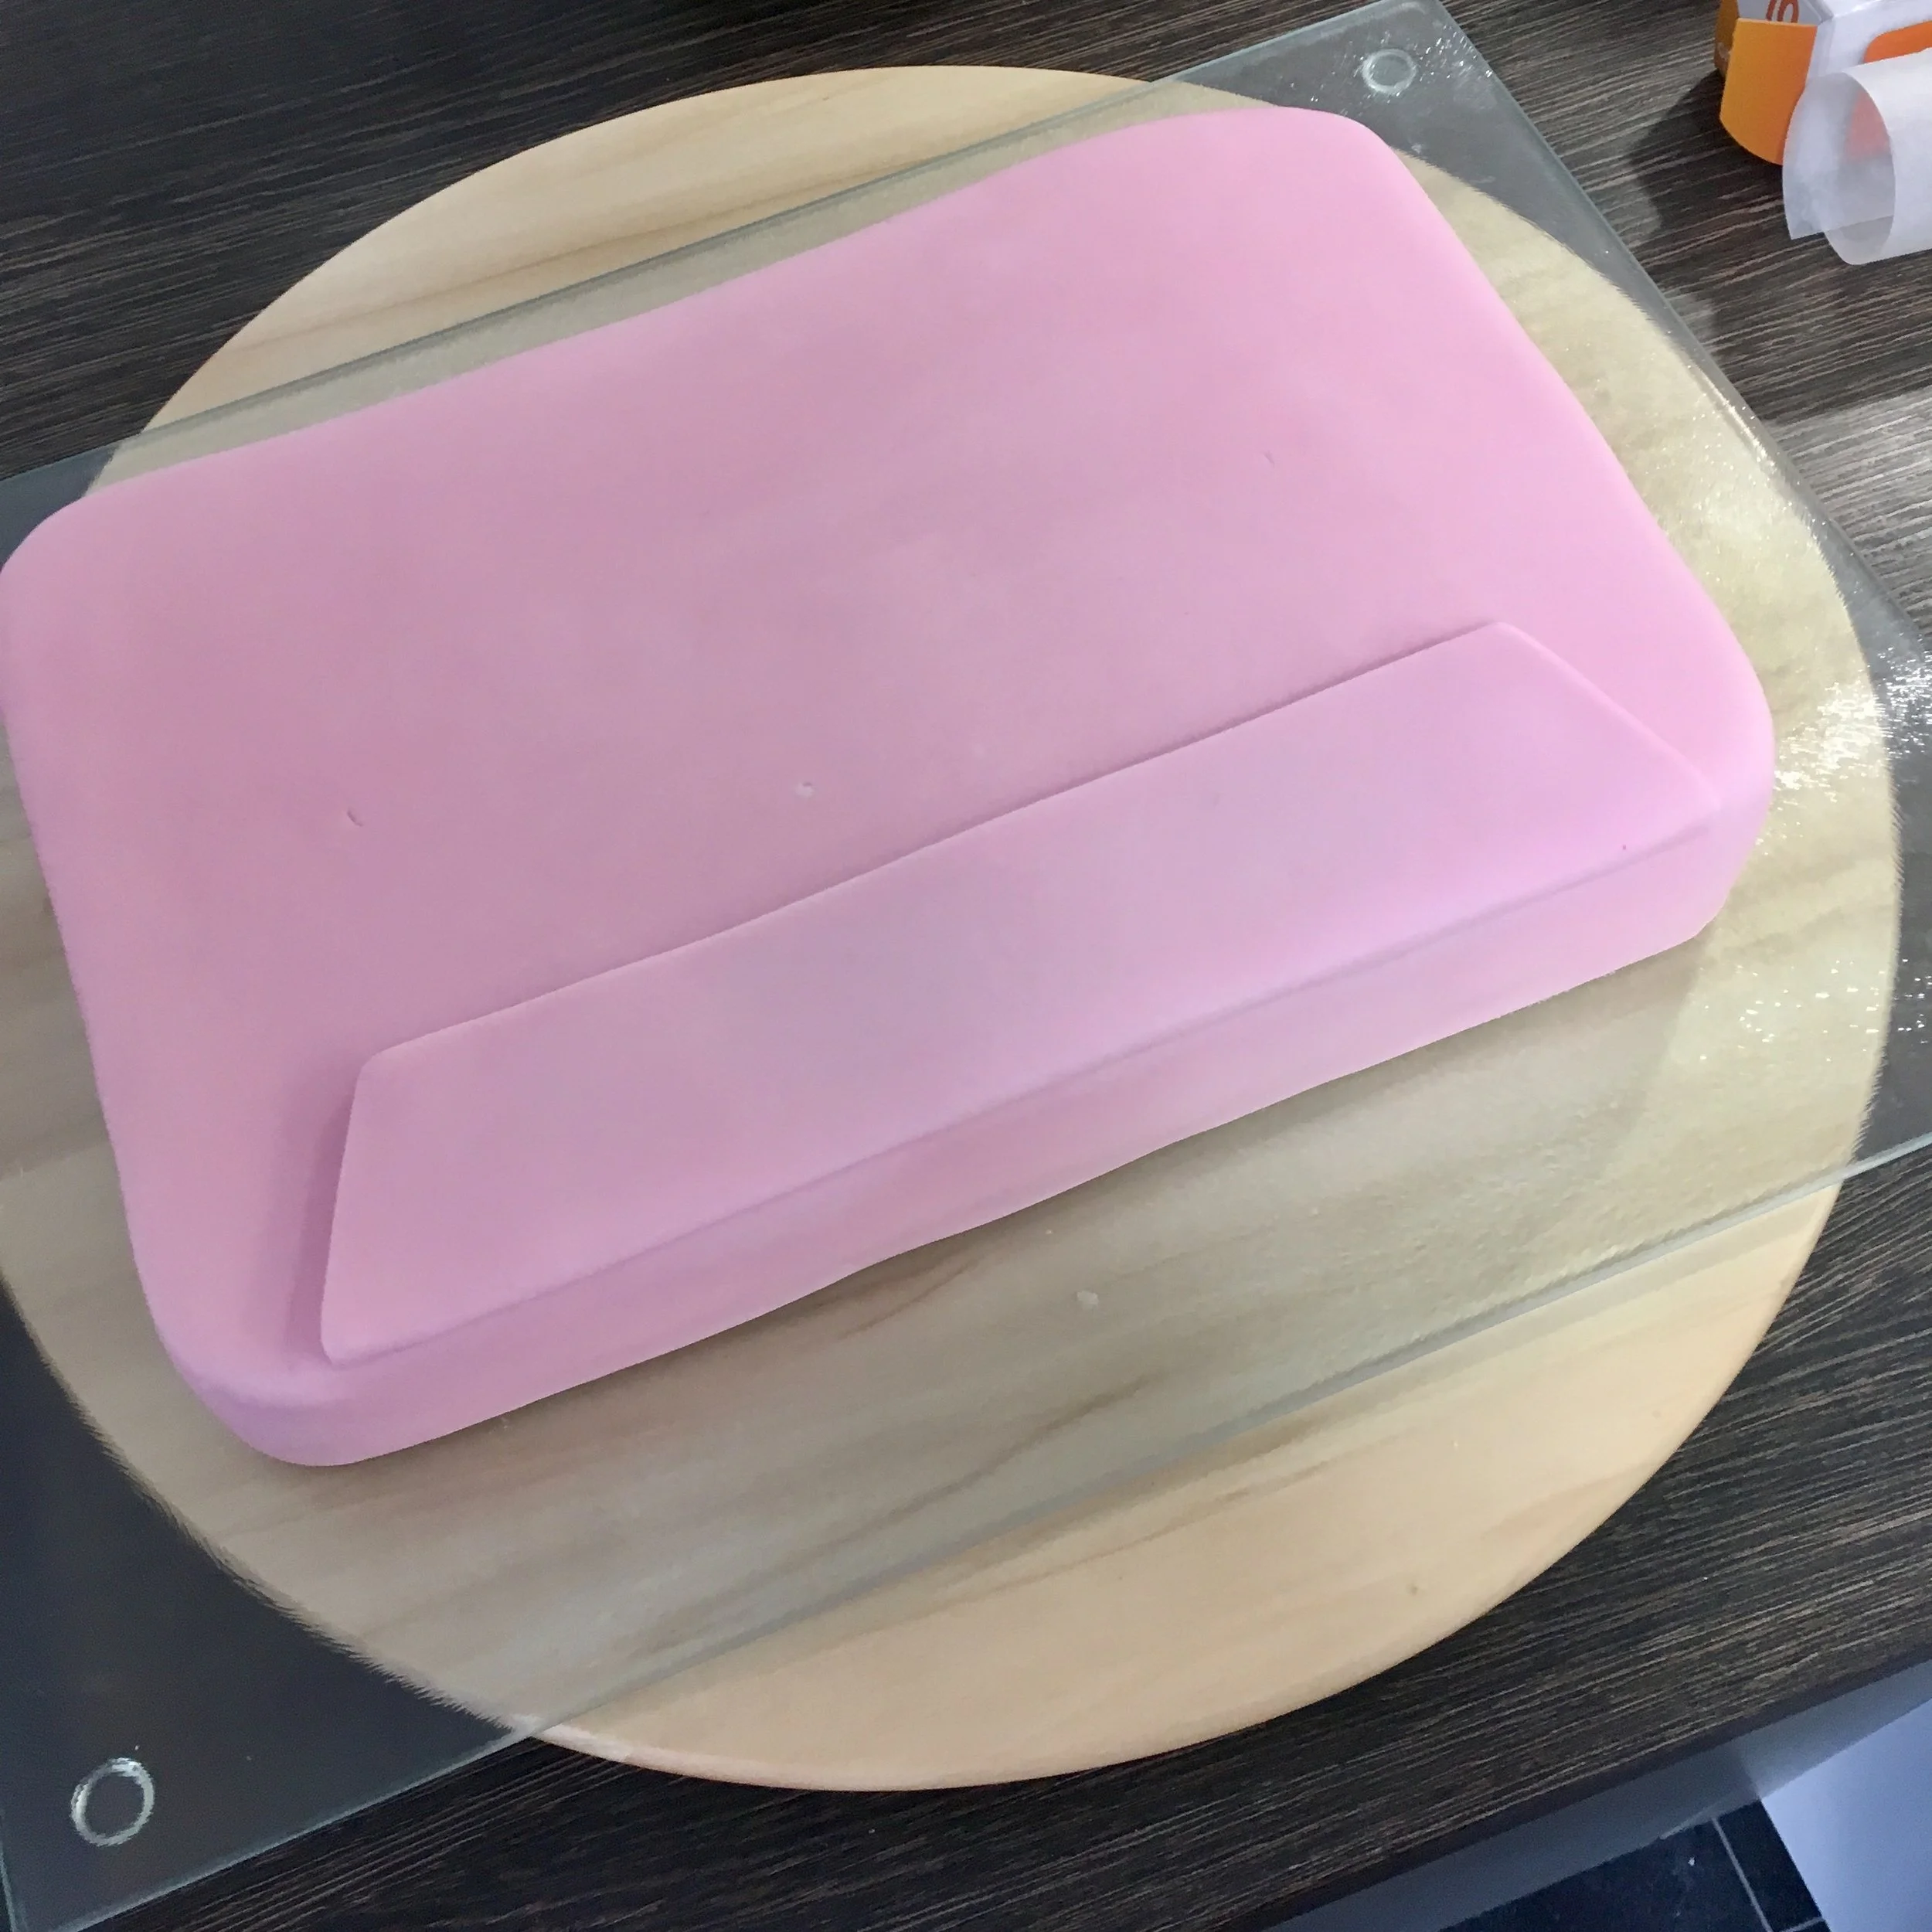
Apply a little piping gel or sterilised water across the top of one of the long sides on the cake. Attach the piece of fondant we just cut and use a dry finger to gently smooth around the edges and secure it into place.

Take a small ball fondant tool and gently press into the four corners of the cake and the others in the picture below to create little divots.


This time roll 150g white fondant until its 1mm thick and cut to size to fit the centre of the cake. Once cut, leave to stiffen slightly for 5-10 minutes. When its firm enough to handle but not cracking when touched, transfer the fondant to the cake (attaching with a little piping gel).
Use a butter knife to gently score along the white fondant, separating it into 3 equal sections length ways. With a food-only paintbrush dilute a little red food colouring (the gel kind) with a drop of water until its thin enough to paint. Use this to paint the outer sections of the middle panel. Leave to dry.

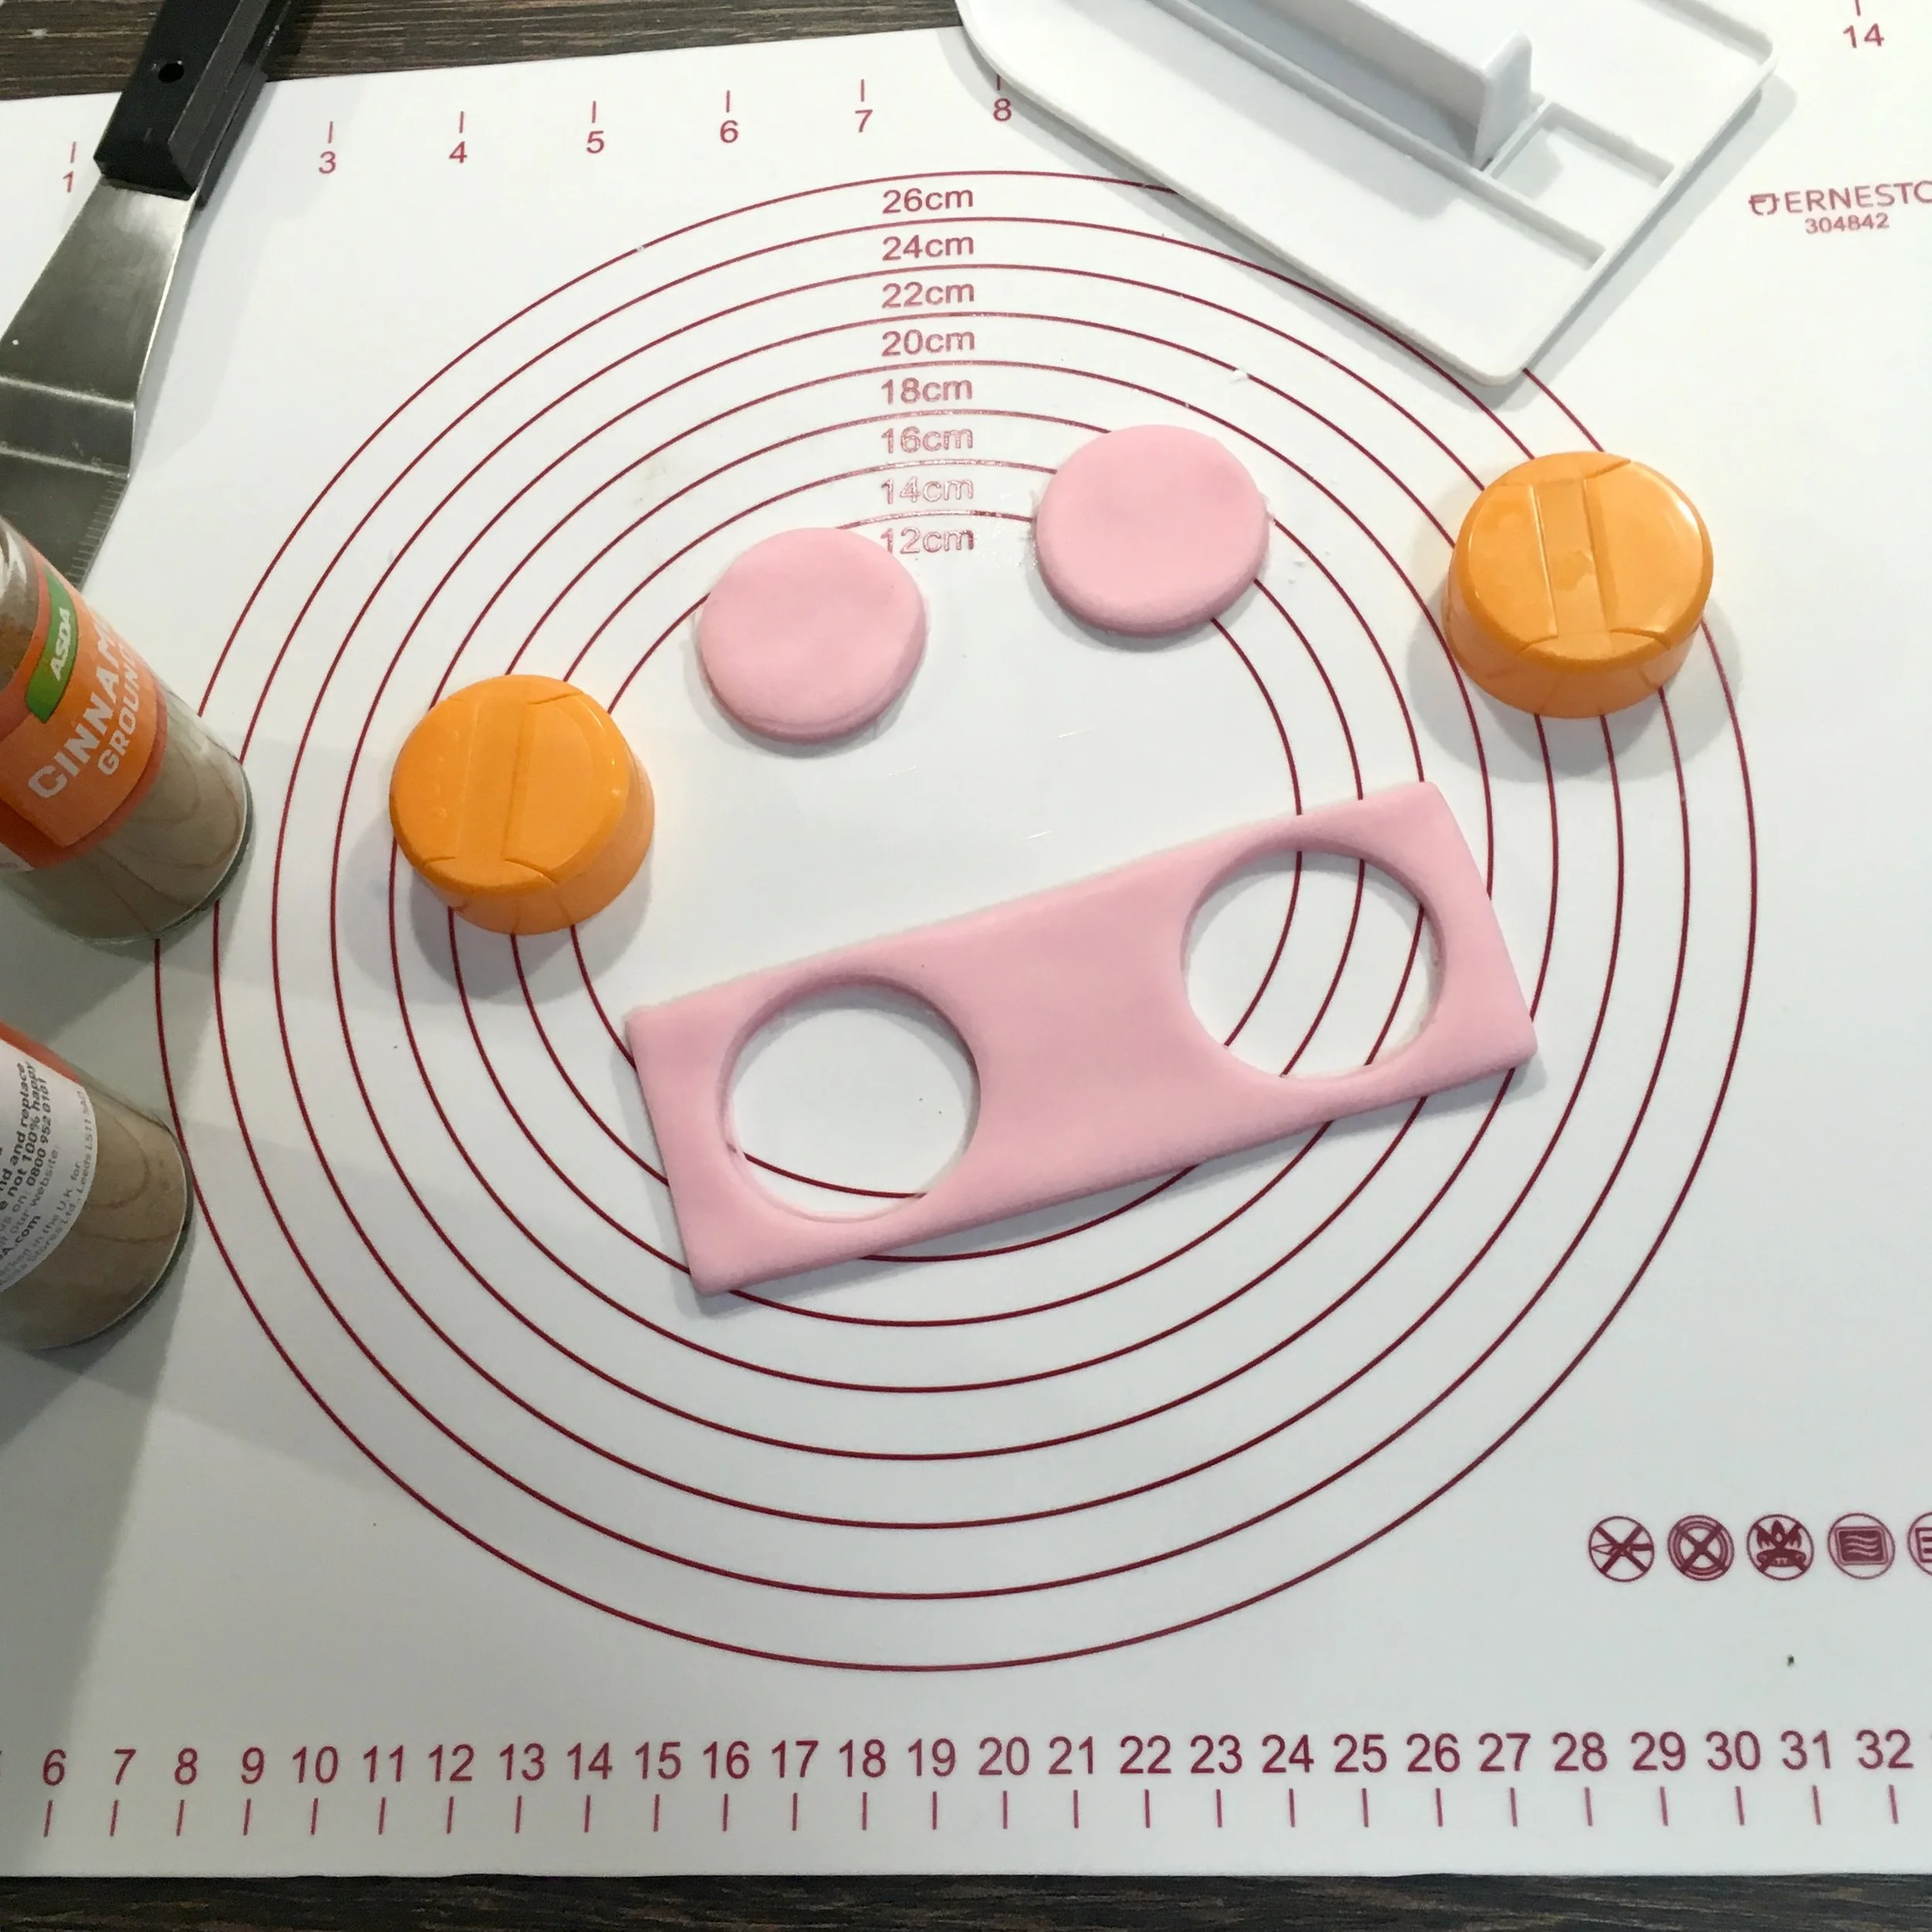
Using the remaining pink fondant, roll to 3mm thick and cut into a rectangle large enough for the centre piece below. Use small round cookie cutters (or spice lids) to cut 2 holes in the rectangle. Gently remove the circles and return the cookie cutters in place. Leave this to dry for 10-20 minutes or until you can lift it without losing the shape.


While you’re waiting on that section to stiffen up (choc full of inuendo today, soz!) we’ll go back to the little divots we made earlier in the cake. For the corner ones and the centre one, we’re gonna turn them into screws instead. Tear off a very small piece of pink fondant and roll into a ball with the palm of your hand and forefinger. Place the little ball in one of the divots and gently press down so the top is flat-ish. Use a knife and carefully score a cross into the top of the ball. Repeat for the remaining screws.
When the holey rectangle has firmed up, attach it to the centre of the cake with a little piping gel or water. To make the centre holes look like they go all the way through the cake, paint inside with a dab of red and black food colouring using the same technique as before.
Tear off a small piece of white fondant and roll into an oblong. Place this inside one of the circles, at the edge. Repeat so each circle has 6 little teeth. Using a teaspoon, gently press down the back side (ha!) of each of the little teeth that touches the edge of the circle. We’re gonna add a white rope around this so by pressing down the teeth on that edge we can minimise how much the rope bumps up and down.


Take a small piece of white fondant and roll it into a thin rope, roughly 6-7cm long. Attach this around the inner edge of the circle and trim any excess. Repeat for the other circle. Leave the whole cake to dry for roughly 4 hours. Writing on the fondant is much easier when it’s hard.
When the outer fondant has hardened, use the edible black pen to draw on the label. This is the point where the keen eyed amongst you might have spotted my epic f**k up (I hope not). I wrote my label on upside down! And it took me ages to realise. You can probably imagine, I was gutted! And I remember doing my original sketch wrong and thinking phew, thank god I realised at this stage only to then repeat it later. What a tool! Anyway, use a ruler to mark the straight lines first, being careful not to smudge. But if you do, don’t worry about, ink blots would be super cute on a handwritten cassette. For the ‘A’ and the D-C600 I let the first coat dry and then went back over it to make it stand out against the ‘handwritten’ message’. Don’t forget the xoxo!

Finally, try not to eat it before everyone see’s it but I won’t judge you if you fail that one.